
Direct answer
To build a haunted butcher-shop scene, start with a simple story, divide the space into three visual zones, and give visitors one unmistakable focal point in each zone. Establish the location with stained tile, butcher paper, hooks, crates, an old service counter, and a cold industrial soundscape. Then introduce a masked butcher, one large hanging prop, and a few small “evidence” details. Use red light sparingly, keep the walking route clear, mount every prop securely, and use only lightweight theatrical tools near guests.
The most convincing version does not look like a Halloween store exploded in a garage. It looks like a real workplace that has been abandoned—or is still operating for a purpose no guest wants to discover.
For a ready-made starting point, browse The Horror Dome’s Butcher Shop collection. The collection brings together masks, costumes, severed-body props, specimens, and set dressing that can support one consistent story.
Begin with the story, not the blood
Before buying a prop or painting a wall, decide what happened in this room. A one-sentence premise will make every later choice easier.
Examples include:
- A county meat market was condemned, but the butcher never left.
- A cold-storage company has been accepting “special orders” after midnight.
- A family butcher shop has one locked freezer that inspectors were never allowed to open.
- A roadside processing room is hiding the source of its unusually fresh inventory.
Choose one. Do not combine all four. If the location is condemned, add an inspection notice, sagging plastic sheeting, dead flies, and an intermittent work light. If the shop is secretly active, keep some surfaces organized, let a refrigeration unit hum, and place order tickets beside the cutting table. The scene becomes more disturbing when its clues agree.
This approach also solves a common decorating problem: too much visual noise. A prop belongs only if it answers one of three questions:
- Where are we?
- Who works here?
- What went wrong?
If an object answers none of them, save it for another room.
Choose the type of experience
A butcher-shop display can work in several spaces, but the design should change with the way people encounter it.
| Format | Best approach | Main constraint |
|---|---|---|
| Front-yard display | Create one strong tableau visible from the sidewalk | Weather, wind, and distance |
| Porch scene | Frame a service window or shop entrance | Limited depth and guest proximity |
| Garage walk-through | Build three zones along a controlled path | Egress, trip hazards, and crowd flow |
| Basement or haunt room | Use light and sound to conceal ordinary walls | Ventilation, exits, and local code |
| Photo-op scene | Put the masked butcher behind or beside a counter | Guest contact with props and tools |
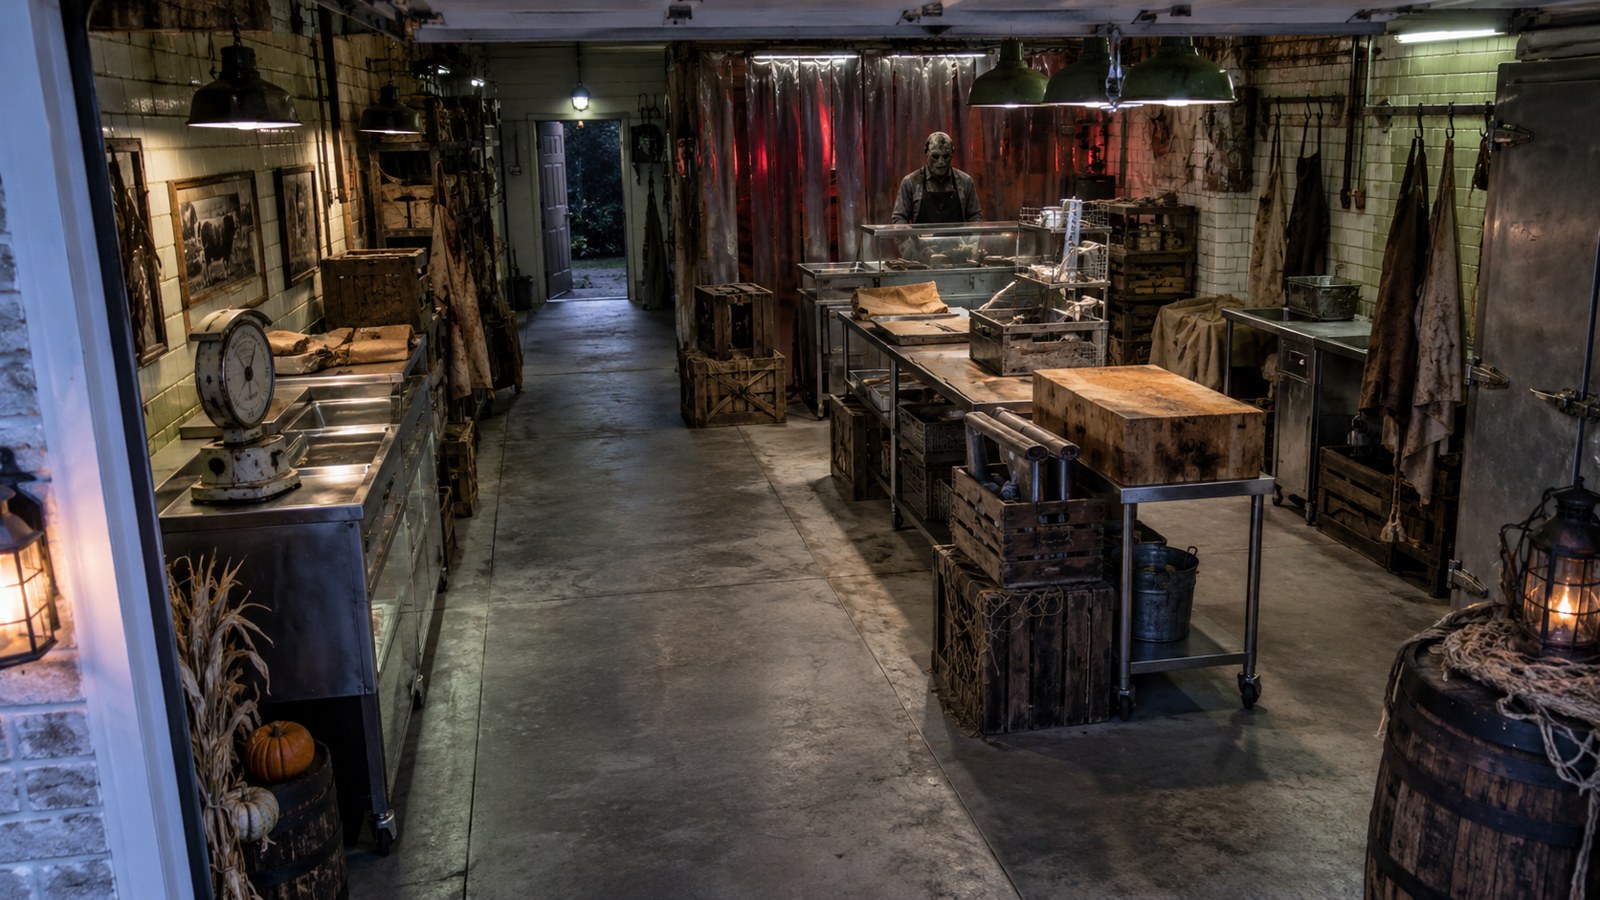
For most home haunts, a garage is the sweet spot. It gives enough depth for a reveal without requiring a complicated maze. A single-car bay can become a complete shop if the route is intentional.
Divide the butcher shop into three zones
Think of the scene as three short beats rather than one decorated room.
Zone 1: The storefront or receiving area
The first zone tells guests where they are. Use a crooked price board, brown butcher paper, a numbered ticket dispenser, plastic strip curtains, stacked crates, and a sign such as “Orders Collected at Rear.” Keep the first view relatively restrained. The goal is recognition, not the biggest scare.
Good details for this zone include:
- An old bell on the counter
- Handwritten order slips
- A stained apron hanging on a peg
- A clipboard with an inspection checklist
- Empty foam trays wrapped in cloudy plastic
- A low refrigeration hum
If the scene is outdoors, print signs on weather-resistant material or mount paper behind clear acrylic. Do not place loose butcher paper where wind can carry it into a walkway or electrical fixture.
Zone 2: The preparation room
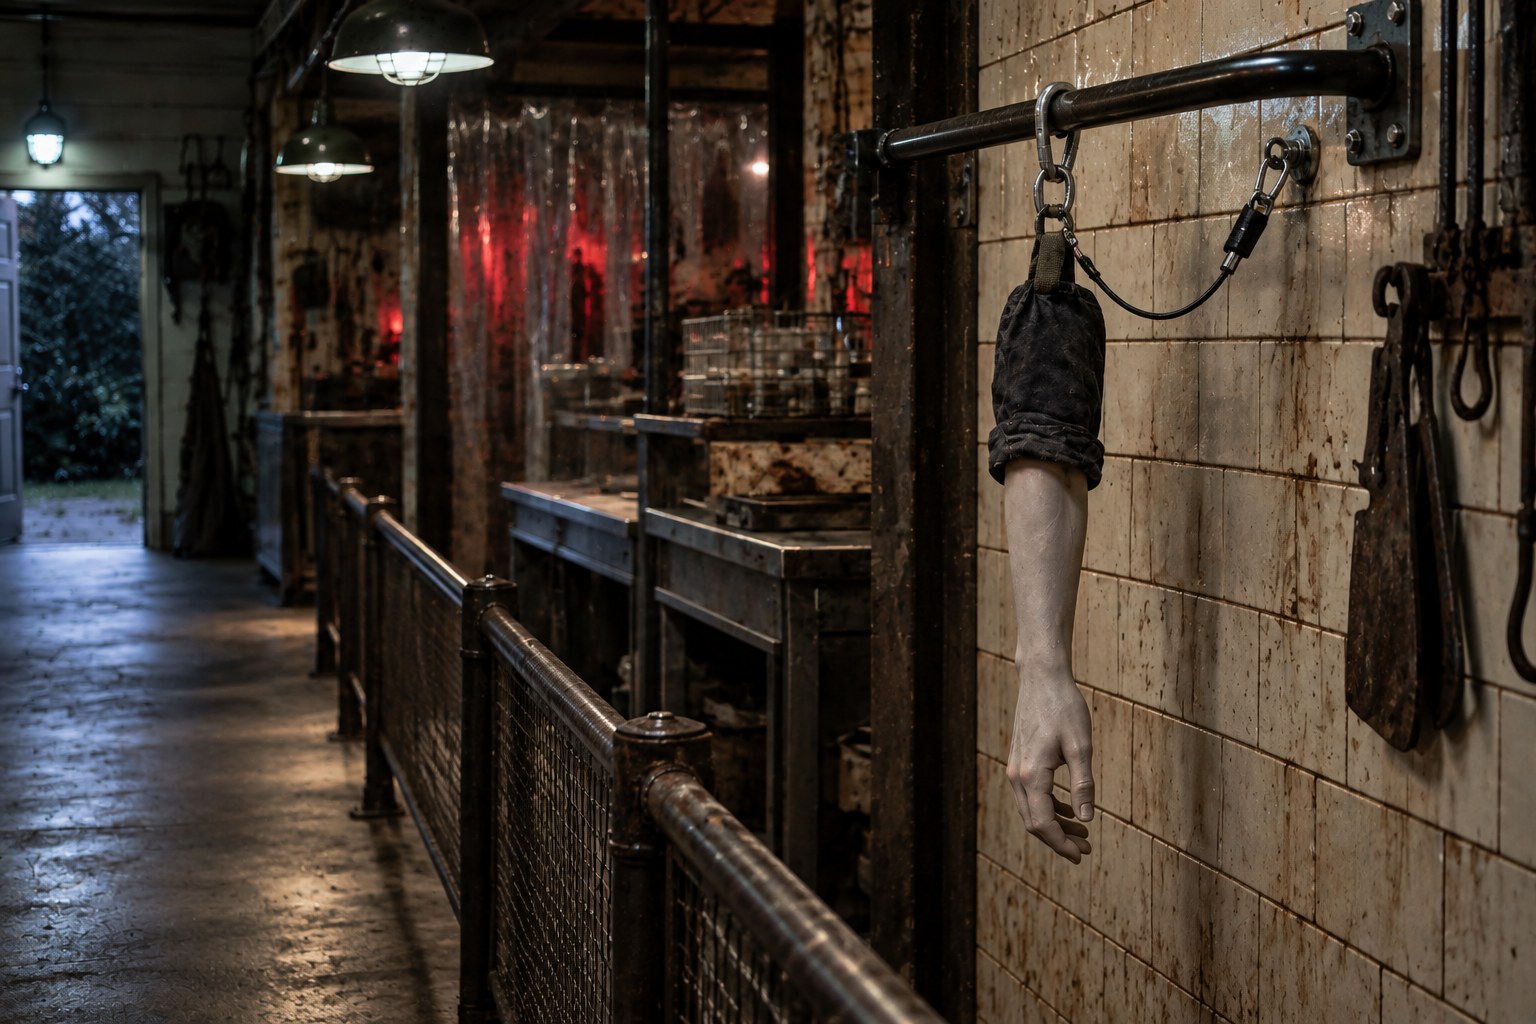
The middle zone confirms that something is wrong. A worktable, hanging rails, stained tile, drain grate, dented buckets, and one body-part prop are enough. This is where texture matters: chipped enamel, oxidized metal paint, cloudy plastic, and dirty grout feel more credible than bright red splatter everywhere.
Use one dominant prop rather than a cluster. The Dangler Bloody Joe Arm is designed as a realistic hanging limb and includes a reinforced loop. Mount it outside the guest path with load-rated hardware and a separate secondary safety tether. Never depend on a decorative hook, adhesive strip, ceiling-grid wire, or the prop loop alone for overhead placement.
The product is made to order, and The Horror Dome currently advises allowing roughly four to six weeks, with possible delays during the August-to-October peak. That makes it a plan-ahead item rather than a last-minute purchase.
Zone 3: The butcher reveal
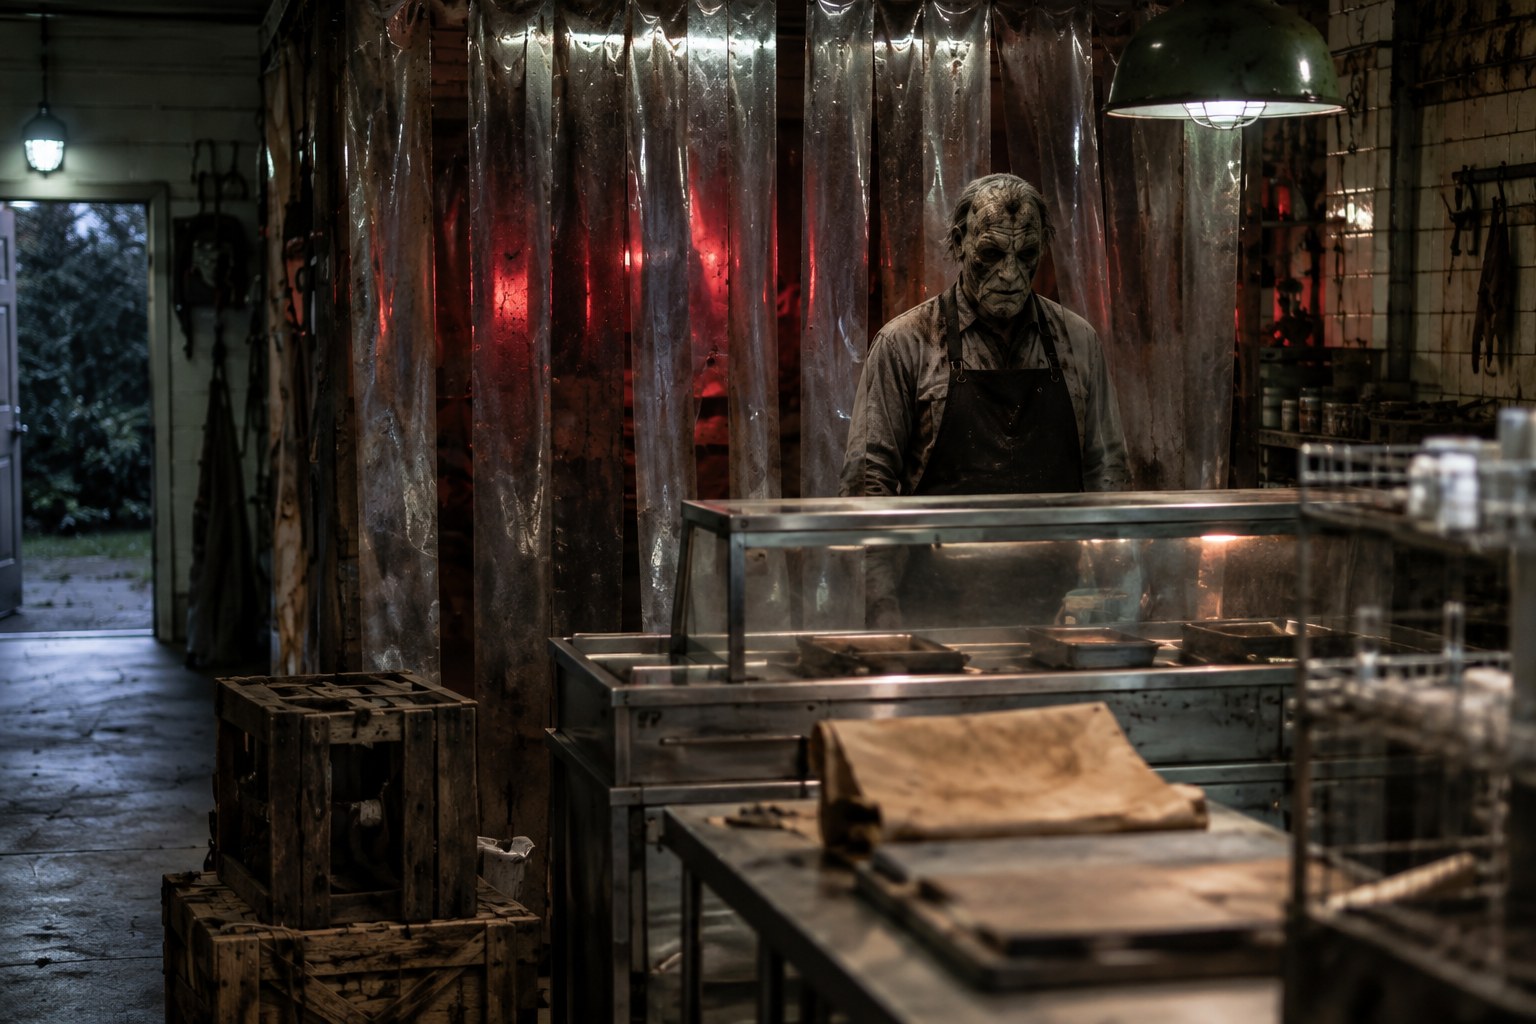
The final zone gives the room a character. Put the actor behind a counter, plastic curtain, freezer door, or service hatch so the reveal has a frame. A figure standing in open space is visible too early; a framed figure can appear in a fraction of a second.
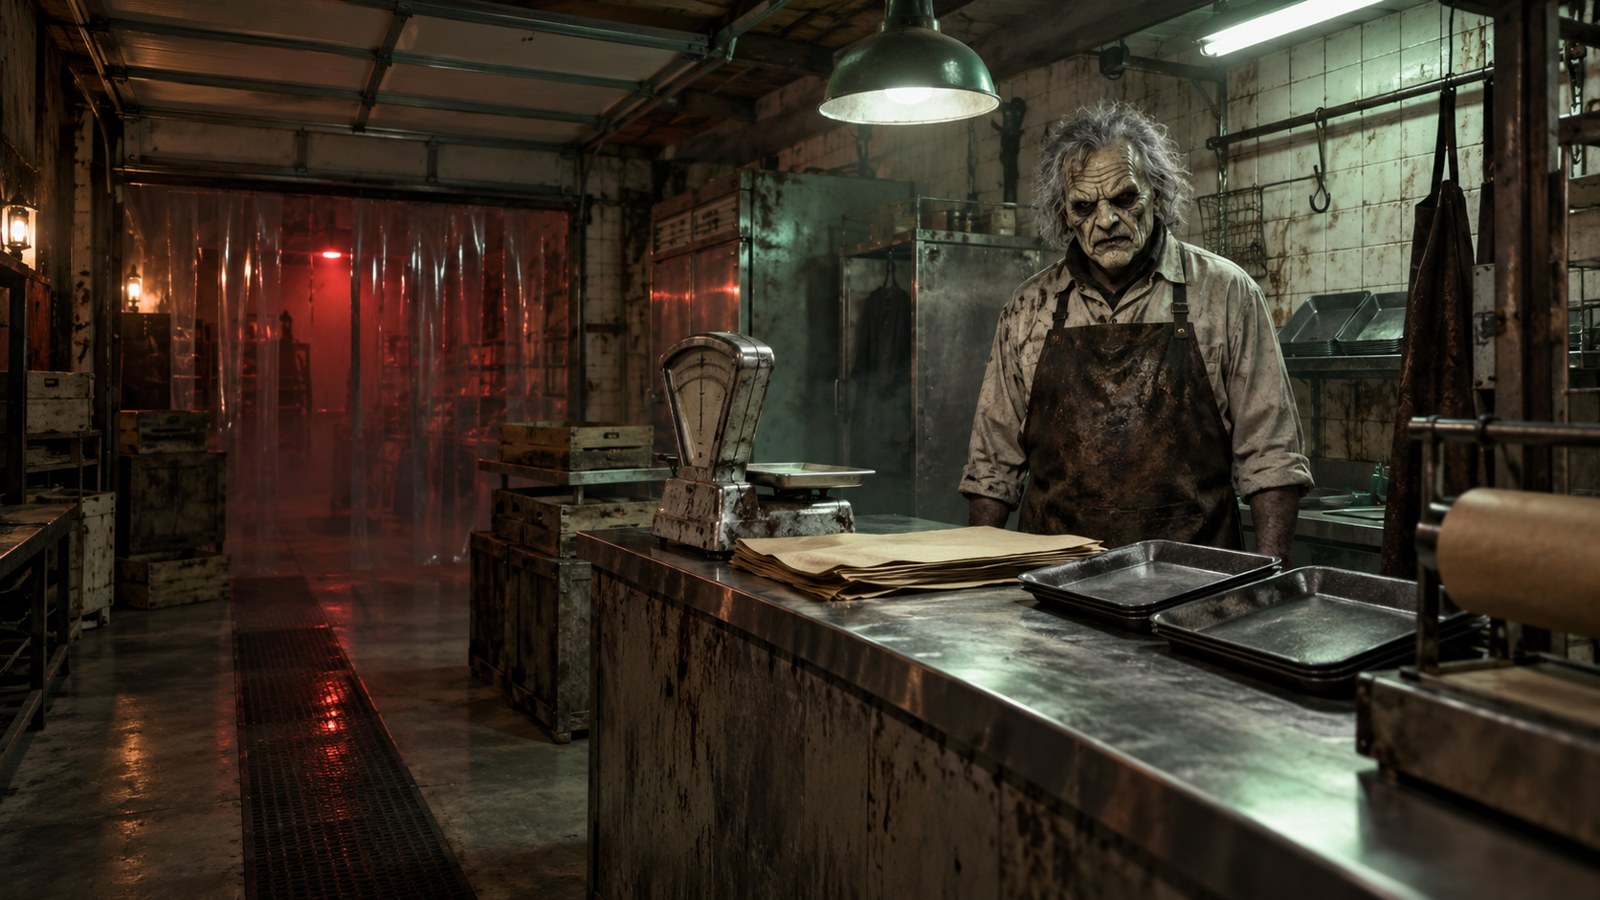
The Slaughterhouse Bubba HD Studios Halloween Costume is a strong anchor because the set pairs a professional-grade latex mask with a matching chest/apron treatment. The current product page offers a complete mask-and-chest option as well as a chest-only option, and lists the full costume as fitting approximately 5 feet 9 inches to 6 feet 4 inches and 170 to 240 pounds. Clothing and shoes are not included, so complete the silhouette with worn work pants, dark boots, and a subdued shirt that will not compete with the mask.
Check the live listing before planning your performance date because inventory and delivery estimates can change.
Make the mask the visual anchor
In a butcher-shop haunt, the character is usually more memorable than the set. Visitors read a face instantly, which is why the mask should receive the best light and the cleanest sightline.
Position the actor so guests see a partial silhouette first. A shoulder, apron, or gloved hand can appear under flickering work light before the mask is fully revealed. Then use a short, controlled lighting change—or let the actor step into the existing light—to expose the face.
Three mask-performance principles help:
- Stillness creates suspense. A motionless butcher can be mistaken for a prop until the exact moment the group commits to the room.
- Small movements read as intentional. A slow head turn is often more disturbing than frantic swinging.
- Distance protects everyone. Keep the actor in a defined performance pocket, separated from the guest lane by a counter, rail, or clear floor boundary.
Actors should rehearse in the actual mask. Check peripheral vision, ventilation, hearing, and floor visibility. Assign a spotter when visibility is limited. No actor should chase guests into stairs, driveways, streets, or unlit areas.
If you want to build a custom butcher character around another mask, the Apron of Flesh can connect the face to the body. The current listing describes a durable latex apron with an elastic strap and is marked for preorder. Treat it as a theatrical costume piece: wear clothing beneath it, give the performer breaks, and clean and store it according to the manufacturer’s guidance.
Build believable surfaces without constructing a real shop
You do not need actual tile, stainless steel, or a floor drain. You need surfaces that read correctly under haunt lighting.
Walls
Create a washable-tile suggestion with lightweight wall panels, printed backdrops, or painted flats. A pale gray or nicotine-stained off-white base works better than pure white. Add thin grout lines, scattered cracks, and grime where walls meet counters. Keep panels freestanding or fastened to proper supports; do not block electrical panels, fire equipment, windows required for egress, or door hardware.
Counter and worktable
Use a stable table with rounded edges and a fitted cover. A faux metal surface can be made with metallic paint or removable film, then aged with water-based scenic paint. Avoid actual rusted sheet metal, exposed screws, glass, sharp edges, or real butcher blocks that are too heavy to move safely.
Floor
The floor should appear dirty while remaining dry and grippy. Paint a removable floor cloth away from the walking lane, or use a printed mat designed not to curl. Do not pour syrup, gel blood, water, glycerin, or fog fluid on a walking surface. Even a small glossy patch can become a slip hazard in low light.
Hanging rail
Build the illusion of a meat rail beside the route, not above it. Lightweight PVC can be painted to resemble old pipe, but it must be structurally supported and positioned where guests cannot grab or collide with it. Hang foam or latex props with redundant restraints. Keep hard hooks blunt, closed, and out of reach—or replace them with molded theatrical versions.
Use one detailed specimen as close-up evidence
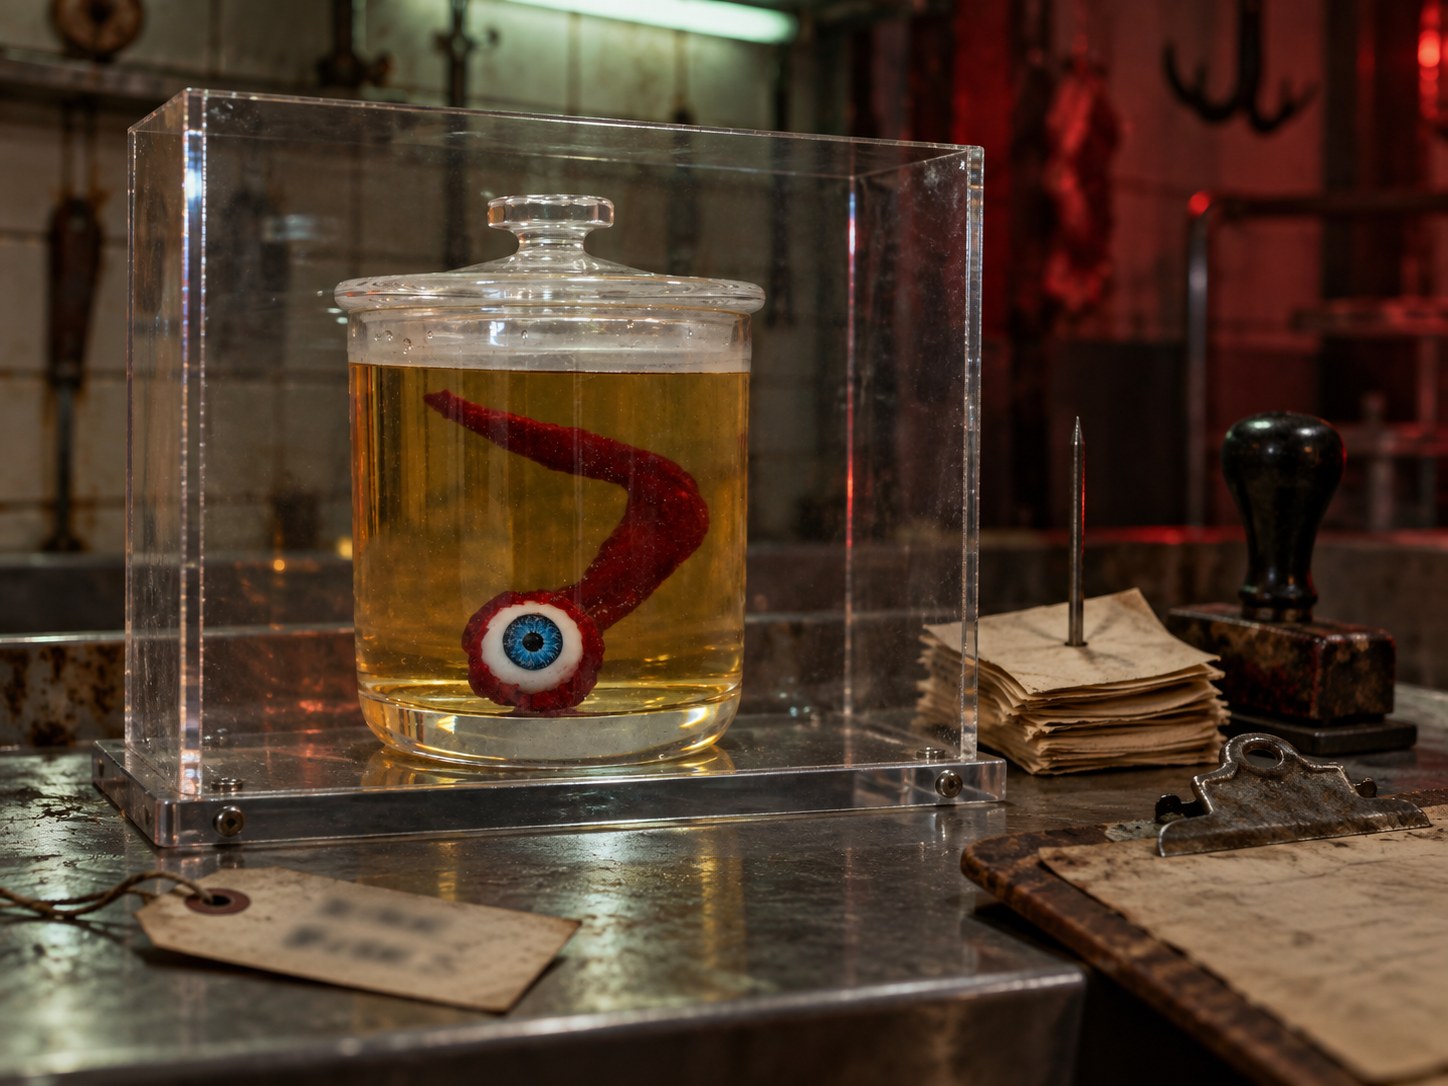
Large props establish danger; small props reward people who look closely. The Nerve Eye in Specimen Jar can sit on an evidence shelf, cashier counter, or inspection desk. Its compact scale makes it useful in a scene that already has one larger hanging piece.
Place the jar behind a clear guard or out of visitor reach on a stable, low shelf. Follow the maker’s current preparation and care instructions if the display uses liquid. Do not put breakable or chemical-filled containers where children, pets, actors, or guests can handle them. For a public-facing home display, the safer choice may be a sealed acrylic container with a dry or manufacturer-approved presentation.
Surround the specimen with ordinary paperwork: a numbered tag, date stamp, inventory line, and initials. Mundane documentation makes a strange object feel like part of a system, which is more unsettling than another splash of color.
Light the scene like a workplace
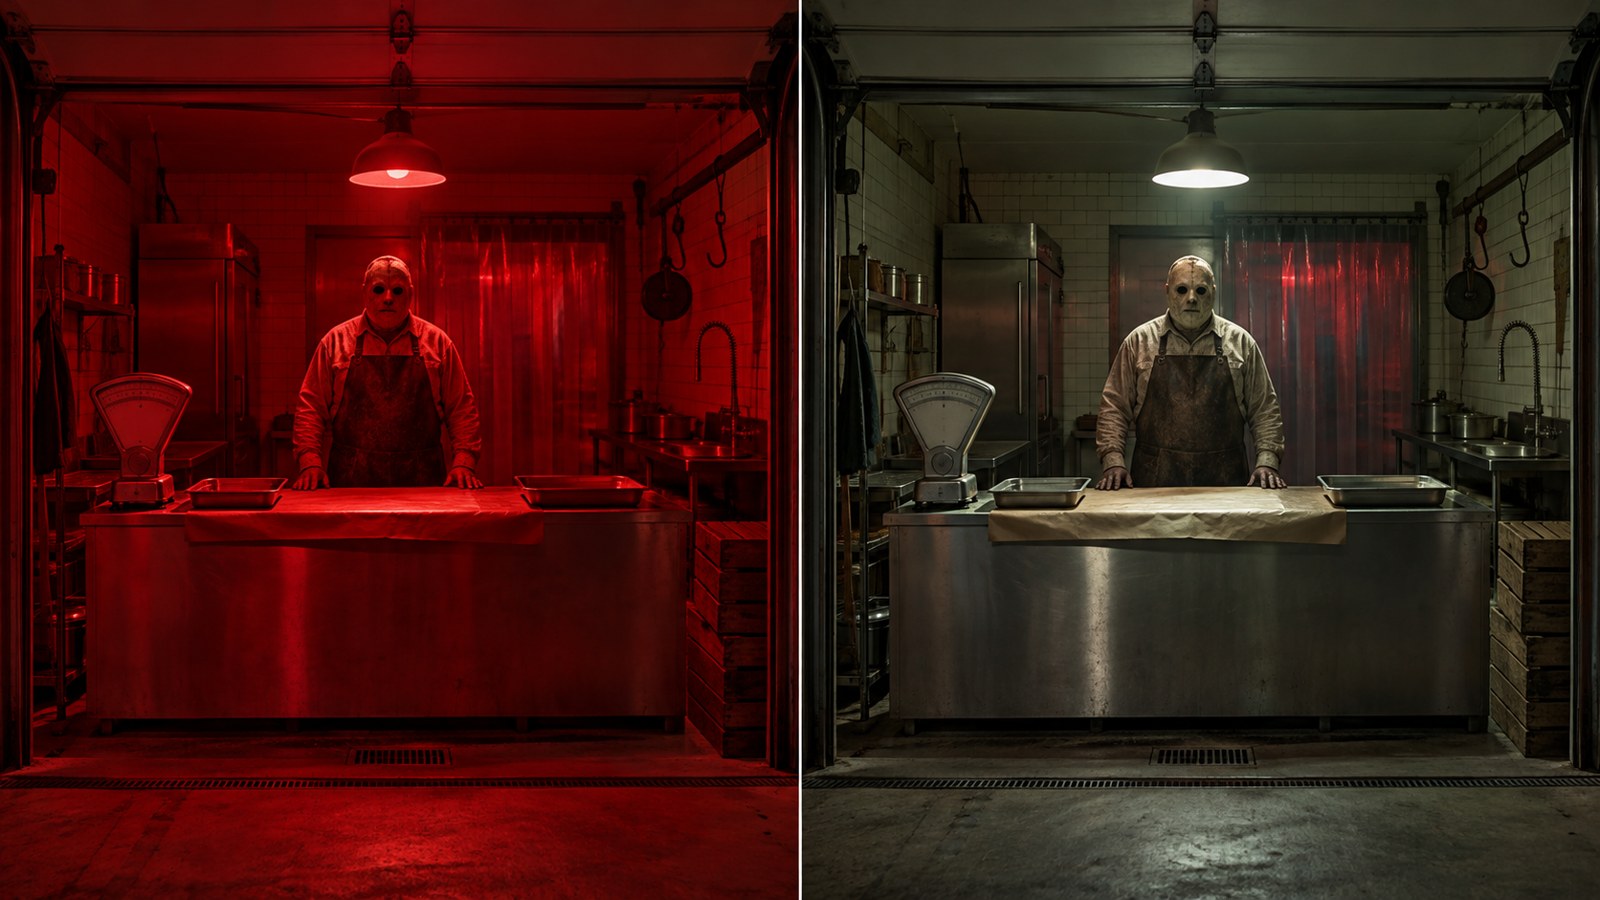
Red lighting is useful, but an all-red room flattens texture and makes every prop look the same. Start with a sickly white, pale green, or cold blue work light. Reserve red for one background pocket or a brief accent.
A simple lighting plan uses three fixtures:
- Front-zone practical: a dim service-counter lamp or simulated fluorescent fixture.
- Middle-zone work light: a narrow overhead beam aimed at the preparation table or hanging prop.
- Reveal light: a low side light that catches the butcher’s mask without shining into guests’ eyes.
Conceal fixtures from direct view and secure every cable. Use grounded, outdoor-rated equipment where exposure requires it, follow load limits, keep connections dry, and never defeat safety plugs. Tape is not a substitute for proper cable covers across a walking route.
Flicker should be occasional and purposeful. Rapid or sustained flashing can create accessibility and health concerns. Warn guests before any strobe-like effect, provide a bypass where practical, and follow local rules for public events.
Give the room an industrial soundscape
The best butcher-shop audio feels as if the building is operating around the visitor.
Build a low-volume loop from three layers:
- A steady refrigeration or ventilation hum
- An irregular fluorescent buzz or compressor start
- A rare metallic scrape, rolling cart, or distant freezer-door impact
Keep the loud event rare enough that guests stop anticipating it. If an actor is present, preserve enough headroom for the performer’s breath, footsteps, or a single line.
Directional speakers can localize a sound behind the freezer or under the counter. Keep speakers and wiring away from wet effects, guest contact, and outdoor exposure unless the equipment is designed for it. Check neighborhood noise rules and choose a shutdown time before opening night.
Scent is optional. If used at all, keep it subtle, disclose it, and provide a scent-free route or experience when possible. Never use spoiled food, raw meat, irritating chemicals, or anything that can attract pests.
Control gore with a visual hierarchy
Realism comes from contrast. If every wall, prop, and costume is equally bloody, the eye has nowhere to settle. A better hierarchy is:
- 70 percent workplace: counters, paper, tile, bins, signs, tools, light
- 20 percent neglect: grime, rust-colored scenic paint, broken labels, cloudy plastic
- 10 percent horror: the mask, hanging arm, specimen, or one concentrated stain
This ratio is not a scientific rule; it is a useful editing test. Photograph the room from the guest entrance. If the first image looks like scattered red objects, remove pieces. If it reads immediately as a closed butcher shop and then reveals something wrong, the story is working.
Use theatrical blood products only as directed and test them on scrap material. Some products stain concrete, siding, clothing, and latex. Keep all wet-looking finishes dry to the touch before guests enter.
Stage tools without creating hazards
A butcher scene suggests knives, cleavers, hooks, saws, and grinders, but real tools do not belong in an interactive haunt.
Use flexible foam, rubber, or lightweight theatrical replicas. Permanently remove or lock away actual blades before decorating. Fix display tools to a wall or table so visitors cannot pick them up. Do not hand even a realistic-looking prop weapon to an actor who will make sudden movements near guests.
If the scene includes a powered “saw” effect, use a purpose-built haunt prop with guarded moving parts and follow its instructions. Sound alone can sell the idea without bringing a motorized object into the guest lane.
A Lafayette garage example
Imagine a one-car garage in Lafayette, Indiana, turned into the fictional Tippecanoe Cold Storage—Closed by Order for one October weekend.
The garage door opens only halfway visually, with a properly supported scenic header hiding the real tracks. Guests enter along the left side beside a service counter and a posted inspection notice. A low refrigerator hum establishes the shop. Cloudy strip curtains hide the back third of the garage.
In the middle, a single Dangler Bloody Joe Arm hangs beside—not above—the path, lit by a cold work light. The Nerve Eye jar sits behind acrylic on the counter with a numbered evidence tag. Nothing else in the room is strongly graphic.
At the rear, Slaughterhouse Bubba stands motionless behind the curtain. A compressor sound stops. The actor slowly turns into a side light, rings the counter bell once, and points guests toward the unobstructed exit. The whole experience lasts less than a minute, but it has a beginning, discovery, and ending.
Because the display is residential, the creator checks Lafayette and Tippecanoe County requirements that apply to the property, keeps the public sidewalk and driveway sightlines clear, sets a reasonable closing time, and avoids implying that the fictional business is real.
Build it in the right order
A good installation sequence prevents last-night chaos.
Four to eight weeks before opening
- Finalize the one-sentence story and floor plan.
- Check current product availability and made-to-order timelines.
- Order the mask, costume, and hero props.
- Confirm local rules, insurance needs, power access, and weather plan.
- Recruit performers and a safety monitor.
Two to three weeks before opening
- Build and paint wall flats, counters, and rail illusions.
- Record or assemble the sound loop.
- Fit the costume and rehearse limited-visibility movement.
- Test each light, cable, mounting point, and prop restraint.
One week before opening
- Install the scene and walk the path at guest eye level.
- Test with all show lighting on and household lighting off.
- Invite someone unfamiliar with the design to walk through slowly.
- Remove anything they touch, trip over, misread, or need to duck beneath.
Before every show
- Inspect mounts, tethers, barriers, cords, exits, and floors.
- Confirm the actor’s safe zone and emergency stop signal.
- Check weather and electrical exposure.
- Test sound levels from the property line.
- Keep a bright work light and first-aid kit accessible to staff.
Safety checklist for a walk-through butcher shop
The scene should feel dangerous without being dangerous. Before opening, confirm all of the following:
- The entrance, exit, and emergency route remain obvious to staff and unobstructed.
- The walking surface is dry, level, grippy, and free of curling fabric or loose cords.
- Guests never need to step over a threshold they cannot see.
- Hanging objects are outside the guest path and have primary and secondary restraints.
- Scenic walls and counters cannot tip if bumped.
- Props within reach are soft, blunt, lightweight, and secured.
- No real knives, hooks, saw blades, broken glass, raw meat, or open chemicals are present.
- Fog, scent, flicker, and loud sound are disclosed and can be bypassed when feasible.
- Electrical equipment is used within its rating and protected from moisture.
- Actors can see, breathe, hear cues, and exit quickly while masked.
- A sober adult monitors the attraction and can stop it immediately.
- Occupancy, accessibility, fire, permitting, and neighborhood requirements have been checked with the appropriate local authorities.
For a public or commercial haunt, consult the fire marshal, building authority, insurer, and an accessibility professional early. A decorative home display and an attraction that admits the public may be treated very differently.
Which Horror Dome pieces should you buy first?
Prioritize the character. The masked butcher creates the memory, while the set makes that character believable.
| Priority | Product | Role in the scene | Planning note |
|---|---|---|---|
| 1 | Slaughterhouse Bubba costume | Masked actor and final reveal | Verify current availability, fit, and delivery |
| 2 | Dangler Bloody Joe Arm | Main preparation-room focal prop | Made to order; allow stated production time plus shipping |
| 3 | Nerve Eye in Specimen Jar | Close-up evidence detail | Secure away from guest handling; follow current care instructions |
| 4 | Apron of Flesh | Alternate or supporting butcher character | Useful when building a custom character around another mask |
Prices, inventory, preorder dates, and production estimates can change. Check each live product page before ordering, especially if your opening date is fixed.
Frequently asked questions
How much space do I need for a haunted butcher-shop scene?
A convincing static display can fit on a porch or in an 8-by-10-foot area. A walk-through needs enough room for a clear guest lane, a separate actor pocket, and an unobstructed exit. Do not force a maze into a small garage; three visible zones along one route are usually more effective.
What is the most important prop in a butcher-shop haunt?
The masked butcher is usually the strongest focal point because visitors respond to a face and body before they study scenery. Build the lighting and sightline around the character, then add one large evidence prop and one small detail.
How do I make fake butcher-shop walls look realistic?
Use pale, slightly dirty colors, thin grout lines, grime at edges, and only a few chips or cracks. Under cool directional light, lightweight painted panels can suggest tile without the weight and expense of real ceramic.
Should I use red lights in the whole room?
No. Constant red light hides surface detail and makes the scene visually flat. Use cold white, green, or blue work light for most of the room, then reserve red for a background accent or brief reveal.
Can I hang props over guests?
Avoid hanging props directly over the route. Place them beside the path and use load-rated mounting hardware plus an independent secondary safety tether. Inspect every attachment before each show.
Can actors carry real or realistic butcher tools?
Never use real blades in an interactive haunt. Use soft theatrical replicas and keep sudden motions away from guests. A fixed foam cleaver or a sound effect can communicate the idea without creating an unnecessary hazard.
When should I order made-to-order Halloween props?
Order as early as possible and work backward from the current production estimate, shipping time, fitting, installation, and rehearsal. Several Horror Dome pieces featured here currently show preorder or four-to-six-week made-to-order timing, with possible peak-season delays. Always confirm the live listing before purchase.
Final takeaway
A realistic haunted butcher shop is a controlled story told through space. Let the entrance establish an ordinary business, let the preparation room reveal the evidence, and save the masked butcher for the final beat. With disciplined lighting, industrial sound, a few carefully selected Horror Dome products, and a truly clear guest route, even a one-car garage can feel like a complete forbidden workplace.
Build the danger into the fiction. Build safety into everything else.