
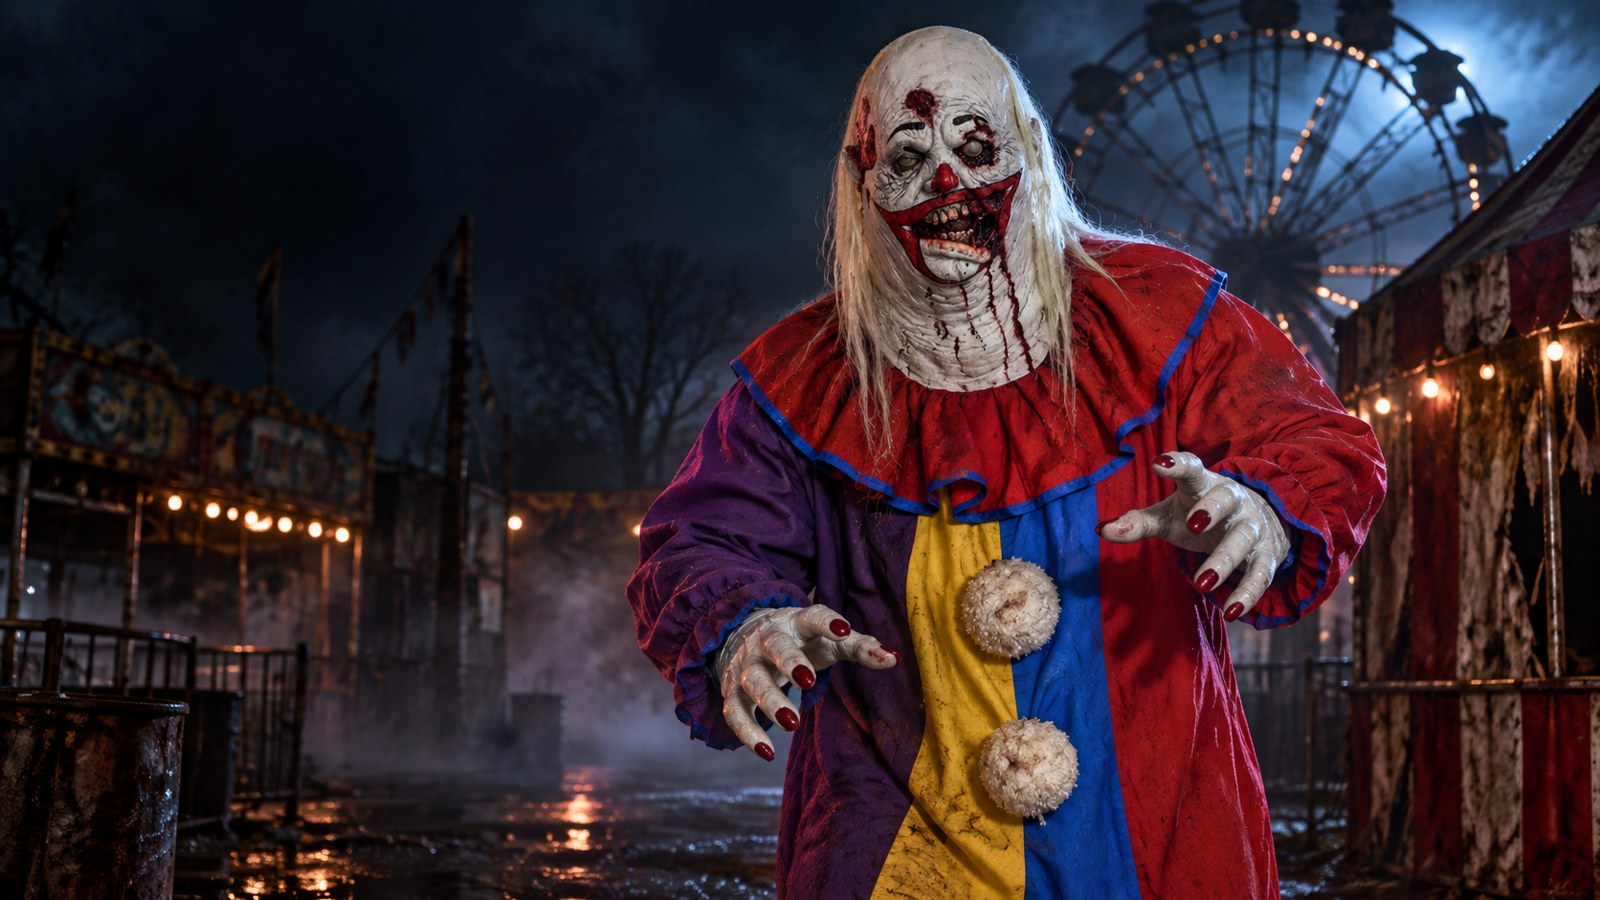
A complete Halloween character starts with one clear idea. The mask establishes the face, age, species, mood, color palette, and often the character’s history. Your clothing, hands, footwear, prop, posture, and movement should reinforce those signals instead of competing with them.
The simplest method is to ask: Who is this character, what happened to them, and what would they be wearing at this exact moment? Once you can answer that in one sentence, the rest of the build becomes much easier.
For example: “This is a carnival clown who died years ago and has just crawled back into the midway.” That sentence suggests faded circus colors, a heavy silhouette, dirty fabric, damaged gloves, slow movement, and perhaps one small carnival-related prop. It does not suggest a shiny new tuxedo, a pirate hook, tactical boots, and a random plastic axe.
That is the difference between a costume and a character. A costume is a collection of pieces. A character feels like all those pieces belong to the same story.
The Seven-Part Character Test
Before buying or modifying anything, look at the mask and make seven decisions.
| Character element | Question to answer | What should match the mask? |
|---|---|---|
| Identity | Who or what is this? | Age, species, occupation, era |
| Story | What just happened? | Damage, dirt, blood, wear |
| Silhouette | How should the body read from a distance? | Height, width, posture, proportions |
| Palette | Which colors dominate? | Clothing, gloves, footwear, prop |
| Texture | What materials belong together? | Skin, hair, fabric, metal, dirt |
| Performance | How does this character move and sound? | Expression, physical condition, temperament |
| Practical fit | Can the actor safely wear it? | Vision, breathing, hearing, heat, mobility |
If one choice cannot be connected to one of these seven elements, it may not belong in the build.
1. Let the Mask Tell You Who the Character Is
Do not begin by shopping for “scary clothes.” Begin by studying the mask as if it were evidence.
Look at the expression. Is the face angry, frightened, hungry, confused, amused, or blank? A screaming corpse calls for a different performance than a grinning clown. Look at the age of the face, the condition of the skin, the hair, the teeth, and any signs of an occupation or period. Then note the strongest two or three colors.
A mask with hollow eyes, stretched cheeks, and an open mouth already communicates panic and pain. A mask with a broad snout, heavy fur, and exposed teeth communicates animal strength. A bloated clown face with faded makeup communicates fallen entertainment and decay. Those are not interchangeable stories.
Write a one-sentence character premise before moving forward. Keep it specific enough to guide choices but short enough to remember while shopping.
Good premises include:
- A county-fair clown who never left after the midway closed.
- A graveyard groundskeeper who became one of his own burials.
- A hiker changing into a werewolf halfway down a wooded trail.
- A hospital patient frozen in the moment the outbreak reached the ward.
Weak premises sound like “a scary monster with lots of blood.” That gives you no direction. Almost any item can fit, which usually means nothing truly matches.

2. Build the Silhouette Before Adding Details
Guests often see the body shape before they see the mask details. This is especially true in a dim haunt corridor, across a front yard, or at the far end of a Lafayette porch. Your character should be recognizable in outline.
Decide whether the body should appear tall, wide, hunched, thin, stiff, or uneven. Then use the clothing to create that shape.
A large clown head benefits from a broader upper body and loose clothing. A gaunt zombie looks stronger in narrow, hanging layers that preserve a thin outline. A werewolf needs the shoulders, arms, and hands to carry some of the mask’s animal mass. If the face looks enormous but the body below it is a clean T-shirt over an ordinary human frame, the illusion stops at the jaw.
Padding can help, but use it deliberately. Add bulk to the shoulders, belly, upper back, or forearms only when it supports the character. Secure it so it cannot shift into the actor’s vision or restrict movement. An uneven pad that moves during a scare will attract attention for the wrong reason.
Test the silhouette by photographing the full costume from 15 to 20 feet away. Turn the image to grayscale or squint at it. If the body still communicates the intended character, the large forms are doing their job.
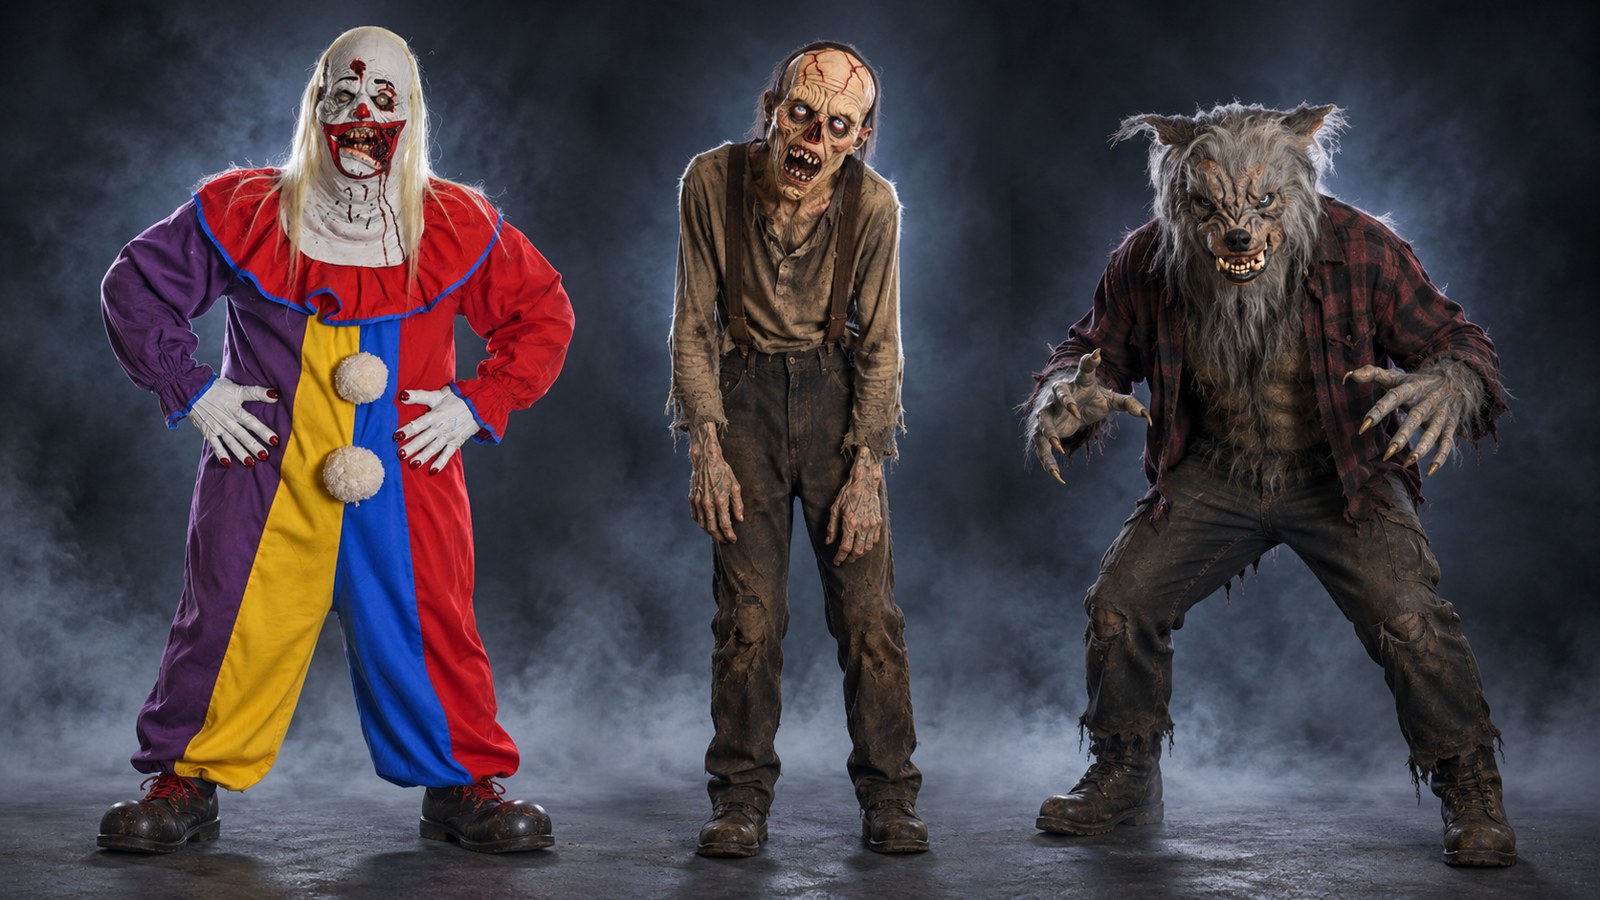
3. Hide the Transition Between Mask and Costume
The neck is where many otherwise strong characters fall apart.
A full over-the-head mask may extend below the jaw, but the edge can still become visible when the actor bends or turns. A gap of clean skin, a bright shirt collar, or a loose latex edge instantly tells the viewer where the character ends and the person begins.
Build the neckline around the mask rather than hoping the mask will cover everything. Depending on the character, useful options include:
- A high coat collar
- A buttoned work shirt
- A ruffled clown collar
- A hood or cowl
- A scarf, bandage wrap, or dirty undershirt
- Long chest hair or fur already built into the mask
The material should look motivated. A werewolf’s chest fur can disappear into an open flannel shirt. A clown’s mask can tuck beneath a large detachable collar. A corpse can wear layered burial clothing or a stained jacket. The goal is not simply to cover the seam; it is to make the transition look like part of the design.
Ask the actor to look left, right, up, and down during a complete mask-fit check. Check the costume from behind as well as from the front. A seam that is hidden in a posed photograph may open as soon as the actor lunges.
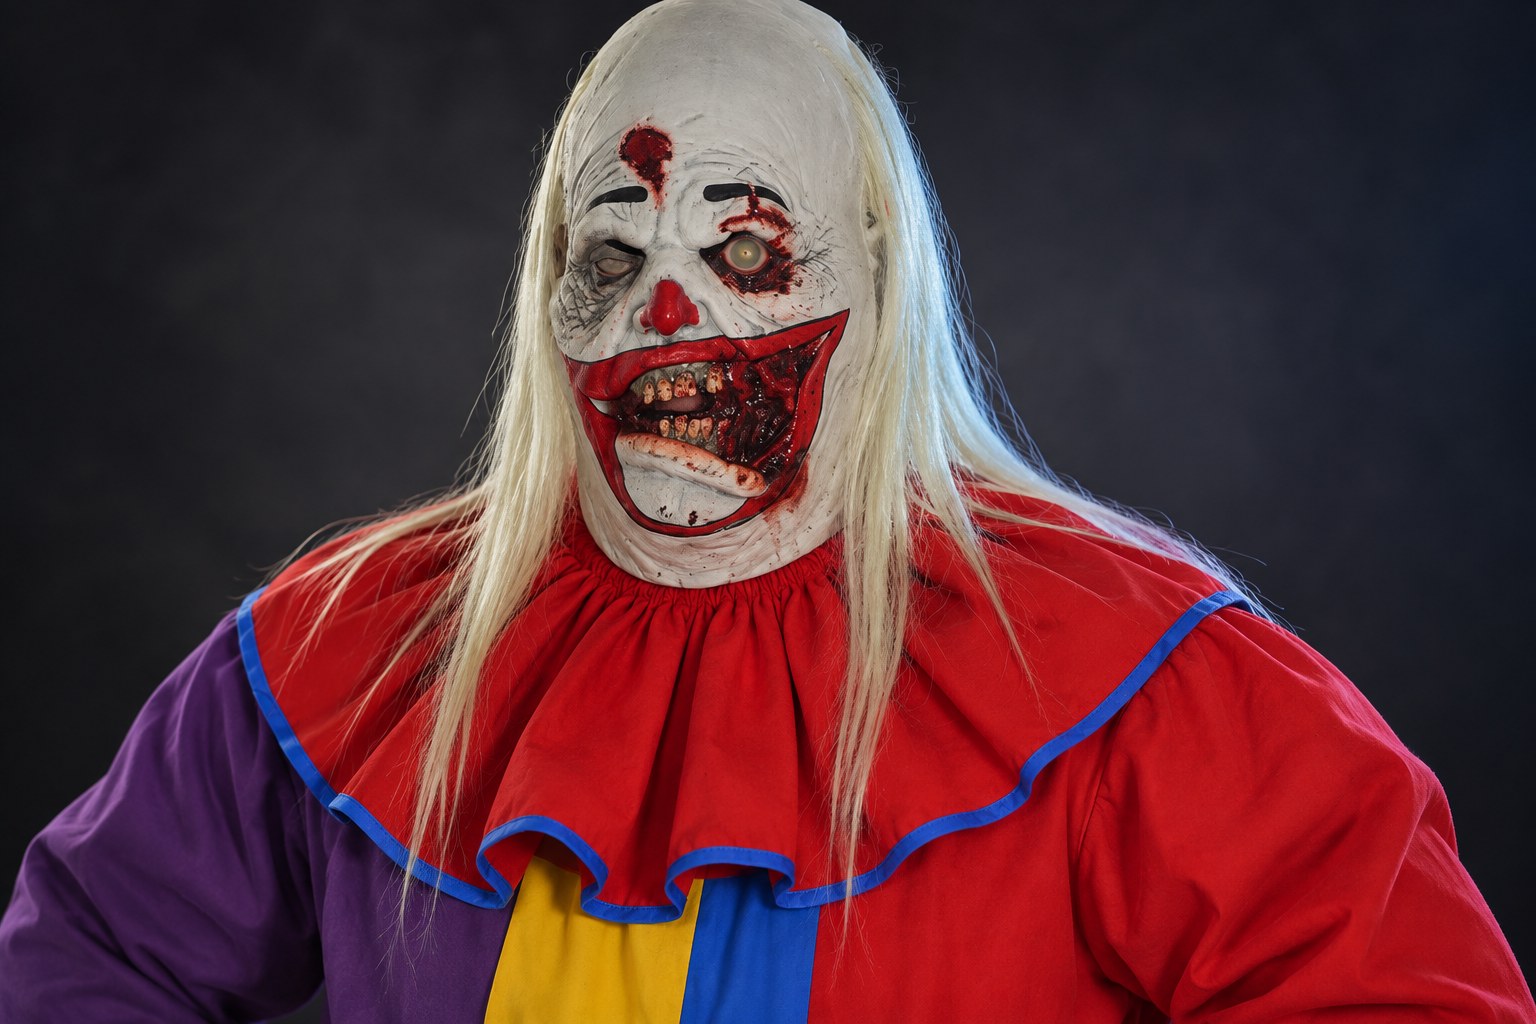
4. Match the Hands to the Face
After the face, hands are often the most visible patch of exposed “skin.” Human hands beneath a creature mask can undo the effect in seconds.
The match does not need to be mathematically exact, but it should share the same visual language. Compare skin color, saturation, veins, wounds, fur, nail shape, and level of decay. A gray-green zombie face works with corpse hands in a similar muted range. A furred predator needs hands or gloves that continue the hair and claw cues. An old character needs age in both places.
Also match scale. An oversized head paired with small bare hands can make the actor look unfinished. Larger gloves help carry exaggerated proportions through the body. Conversely, enormous monster gloves may overwhelm a thin, restrained ghost character.
Function matters too. Before choosing gloves, test whether the actor can open a door, hold a railing, operate a trigger, carry a prop, and release that prop safely. If the hands look excellent but prevent the actor from performing the scene, they are the wrong hands for that role.
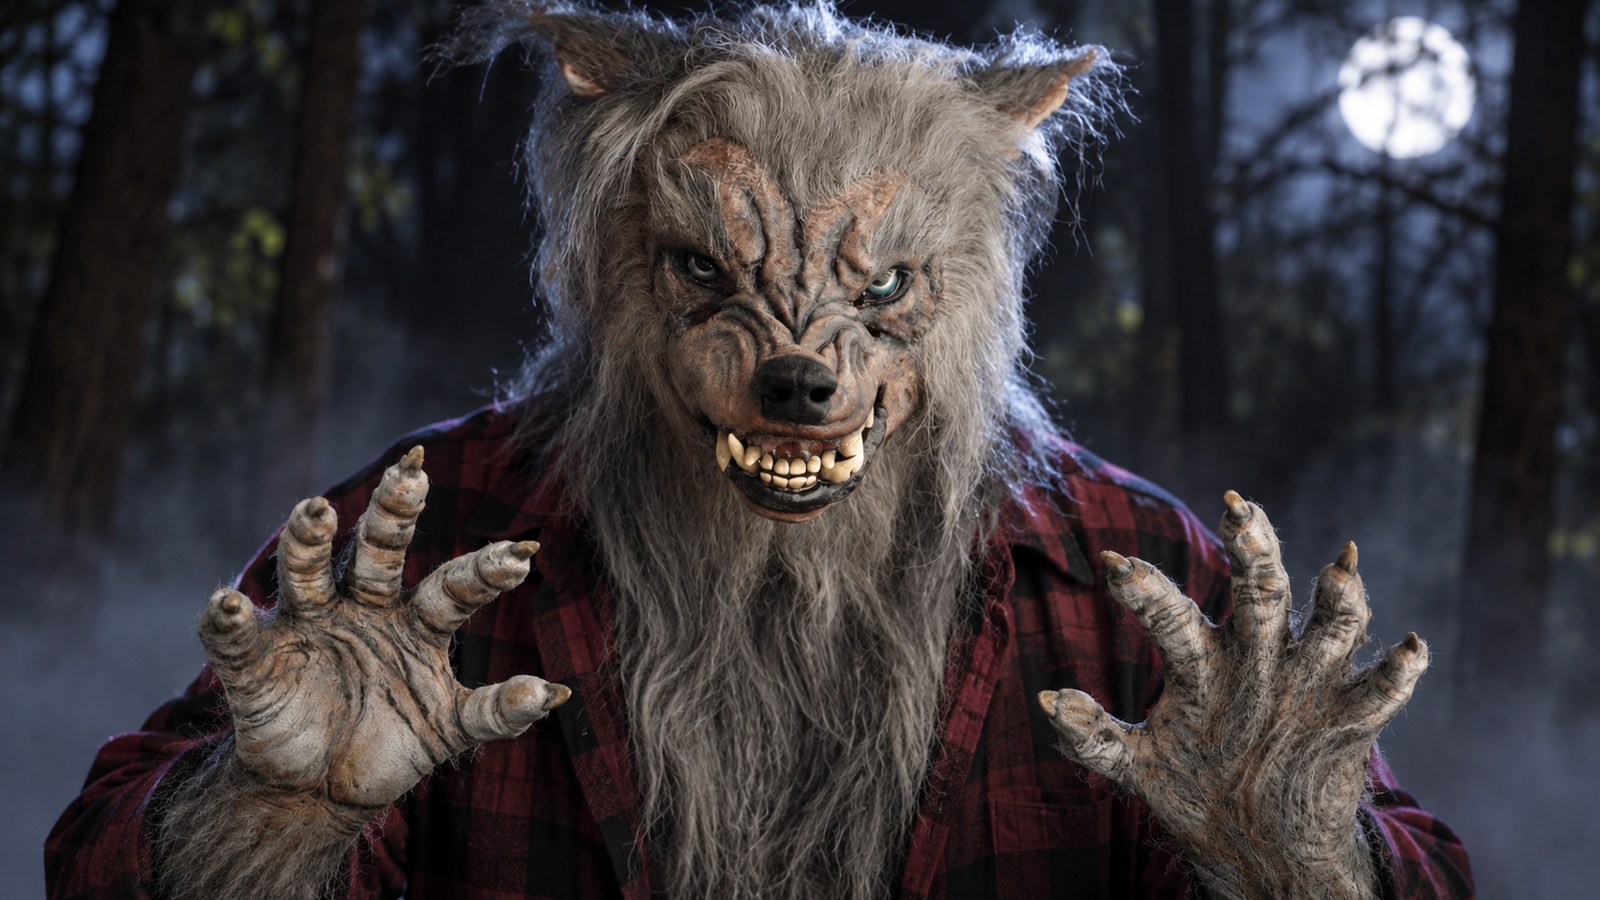
5. Repeat Color and Texture Without Making Everything Identical
A believable character has visual repetition, but not uniformity.
Pull two or three colors from the mask and echo them elsewhere. A faded red from clown makeup might return in a ruffle, stripe, or stained patch. The brown of werewolf fur might reappear in a shirt, belt, or weathered boot. The cold gray of a corpse can be repeated in dusty fabric and pale gloves.
Do the same with texture. Matted hair belongs beside worn fabric, not a pristine satin cape. Cracked, rotted skin feels more convincing with frayed hems, rough dirt, and oxidized metal. Smooth alien skin can work with cleaner, stranger shapes and fewer natural fabrics.
Avoid matching every piece perfectly. Real clothing ages unevenly. Dirt collects at hems, elbows, knees, cuffs, and areas touched frequently. Blood darkens as it dries. Sun fades shoulders before protected seams. Varying the wear makes the character feel lived in.
A useful rule is repeat, then vary. Repeat the dominant colors and materials so the pieces relate. Vary their value, intensity, and condition so they do not look like they came out of one spray-paint can.
6. Give the Clothing a Reason to Look That Way
Distressing works best when it follows the story.
If the character crawled from a grave, add earth tones to the knees, elbows, shoulders, and lower back. If the character worked in a slaughterhouse, concentrate stains where an apron and hands would realistically catch them. If the character escaped a hospital, use worn institutional fabric, dragged hems, old adhesive marks, and restrained discoloration. If the character has wandered through woods, think mud, leaves, torn cuffs, and snagged fabric.
Random cuts and bright red splashes do not automatically create realism. In fact, too much damage can flatten the design because the viewer no longer knows where to look.
Work in layers:
- Age the base color with diluted, muted tones.
- Add dirt where the body would contact the environment.
- Fray or tear only where the story supports friction or injury.
- Add small, dark stains before considering larger ones.
- Put the full costume under performance lighting before adding more.
Remember that theater lighting, porch bulbs, and fog can change colors dramatically. What looks subtle in daylight may become invisible under blue light. What looks like dried blood indoors may turn bright orange beneath a warm floodlight.
7. Choose One Prop That Finishes the Sentence
A prop should explain the character, not merely add another scary object.
Think of the mask and costume as the beginning of a sentence. The prop supplies the final phrase. A groundskeeper may carry a lantern or shovel. A ruined entertainer may hold a bent ticket roll, battered noisemaker, or grimy balloon. A transformed camper may drag a torn backpack. A hospital escapee may trail a wristband or damaged clipboard.
One strong prop is usually better than several unrelated ones. It keeps the actor’s hands manageable, leaves room for safe movement, and gives guests a clear story cue. For an example of carrying one character through an entire setting, see how to build a haunted butcher-shop scene.
Before using any prop around visitors, confirm that it is allowed by the venue and suitable for the setting. Avoid sharp edges, excessive weight, poor visibility, or anything that can be mistaken for a real weapon. Establish a safe grip and a safe way to set it down. For a home display, keep the prop out of walkways and away from steps where trick-or-treaters may crowd together.
A Real Product Example: Building the Fat Zombie Clown
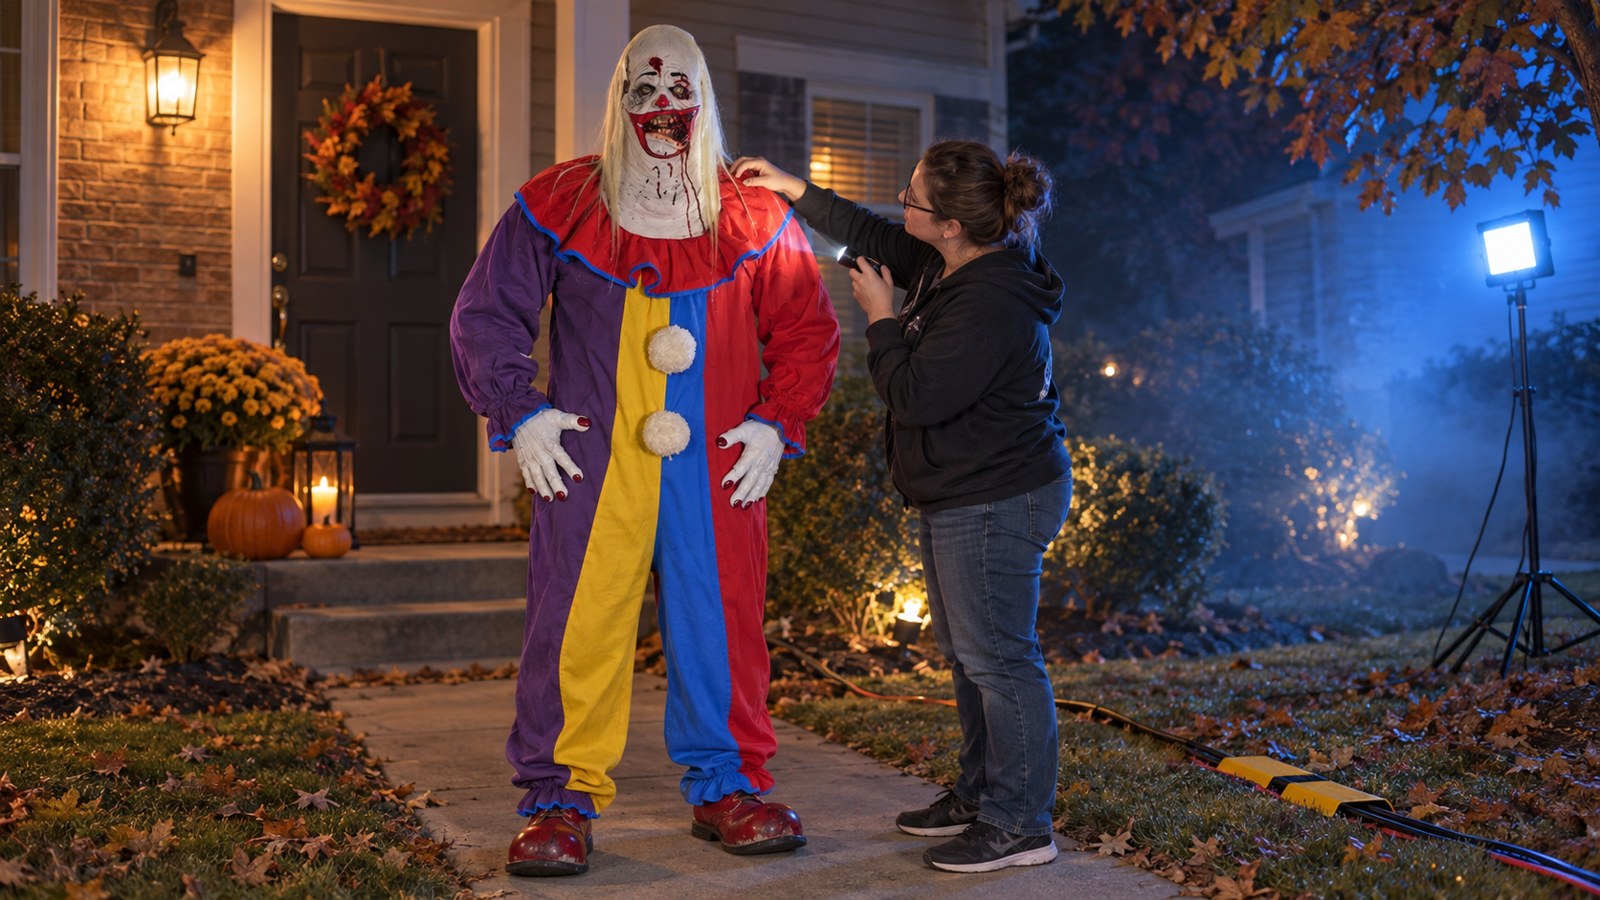
The new Fat Zombie Clown HD Studios Pro Mask is a useful character-design example because the story is already visible in the face. The full over-the-head latex mask combines a bloated silhouette, smeared clown makeup, hollow eyes, a blackened nose, broken teeth, exposed-skull details, and matted hair. It is hand-painted and hand-haired, and The Horror Dome lists it as a limited 2026 design.
Read those details as instructions:
- Identity: A clown, not a generic zombie.
- Condition: Undead, diseased, and neglected rather than freshly injured.
- Silhouette: Broad, heavy, and exaggerated.
- Palette: Faded circus colors, dirty flesh, blackened details, and muted hair.
- Movement: Slow and weighty, with occasional fragments of old showmanship.
The quickest coordinated route is the Fat Zombie Clown HD Studios Halloween Costume. The full option includes the collector mask, latex gloves, and a hand-sewn clown suit with latch closures, hook-and-loop closures, and a detachable ruffled collar. The collar helps solve the neck transition, the gloves continue the decayed skin into the hands, and the suit establishes the body and occupation. As checked on September 15, 2026, the page listed a full-costume option and a mask-and-hands option, both on preorder for estimated September delivery; shoppers should confirm the current status before ordering.
If you begin with only the mask, do not try to duplicate the packaged suit exactly. Use the same design logic. Choose a loose clown or carnival silhouette, keep the colors faded, cover the neck transition, and weather the hands and clothing to the same stage of decay. A clean rainbow wig, a crisp party-store jumpsuit, or polished dress shoes would fight the mask’s worn, undead finish.
For a Lafayette home haunt, imagine this character seated beside a darkened “midway closed” sign near the end of the driveway. From the sidewalk, visitors first read the heavy body and clown collar. As they approach the candy table, the performer makes one small, stiff wave—a remnant of the entertainer he used to be—then lets the hand drop and shambles forward. The mask, costume, setting, and movement all tell the same story before anyone says a word.
Two More Masks, Two Different Builds
The method stays the same even when the character changes.
Screamer Zombie: Build Around Anguish
The Screamer Zombie HD Studios Pro Halloween Mask is a full over-the-head, hand-painted latex mask with an open screaming mouth, hollow eyes, sunken cheeks, exposed-bone detail, and rotting flesh. Its expression is the dominant cue.
That face points toward a thinner silhouette and distressed clothing that hangs from the body: a torn hospital gown, burial clothes, workwear, or a damaged jacket. The actor’s movement could be tense and interrupted—reaching, recoiling, and locking into the same anguish shown in the face. A jaunty walk or relaxed stance would contradict it.
Keep the supporting colors cold and desaturated. Use lighting that catches the cheek hollows and bone structure without washing out the paint. The result should feel like one terrible moment continuing through the entire body.
Bad Moon Werewolf: Continue the Creature Beyond the Head
The Bad Moon Werewolf Mask and Hands Set demonstrates why matched extremities matter. The set pairs a hand-painted, hand-haired over-the-head mask with werewolf hands. Long fur extends over the chest so it can blend into an open flannel or V-neck shirt, and the flexible hands support natural movement.
The build should emphasize width, forward posture, and animal tension. Let the fur bridge the neckline. Use rugged clothing rather than formal costume pieces. Hands should remain visible because they are part of the transformation, but the actor should still be able to navigate safely.
Unlike the Fat Zombie Clown, this character does not need several symbolic accessories. The face, fur, hands, and predatory body language already complete the idea. Adding random gore, chains, and multiple weapons would make the story less clear, not more frightening.
How Much Should You Add to a Detailed Mask?
The more information the mask already supplies, the less novelty the rest of the costume needs.
A highly detailed face may need only a strong silhouette, matched hands, a hidden neckline, and one story cue. A simpler mask may tolerate more texture in the clothes or a more descriptive prop. The goal is visual hierarchy: the viewer should see the character first and discover smaller details afterward.
Use the three-second test. Show someone a full-body photograph for three seconds, hide it, and ask what they saw. If they say “a zombie clown,” “a screaming hospital corpse,” or “a werewolf in the woods,” the central idea is clear. If they list unrelated objects—“an axe, chains, a top hat, blood, and some kind of monster”—the build probably needs editing.
Removing an item is often the fastest improvement you can make.
How to Test the Full Character Before Halloween
Never debut the complete build at the event. Test it under realistic conditions while there is still time to make changes.
Check the view from every distance
Inspect the costume in a mirror, in phone photographs, and on video. Look at it from close range, across a room, and from the likely guest approach. Confirm that the mask remains the focal point and the silhouette reads clearly.
Test the actual lighting
Put the character under the porch light, haunt lighting, or outdoor lighting you plan to use. Check the eye openings and shadows. Make sure the actor can see changes in elevation, cords, visitors, and other performers.
Run a movement rehearsal
Walk, crouch, turn, reach, climb any permitted steps, and perform the planned scare. Watch for exposed skin, lifting mask edges, slipping gloves, loose padding, and clothing that catches under shoes.
Time a full wear session
Wear the complete setup longer than a quick fitting. Heat, condensation, pressure points, reduced hearing, and fatigue may appear only after several minutes. Schedule breaks and have water available. If an actor feels dizzy, overheated, short of breath, or unable to see safely, remove the mask and stop the test.
Record video with sound
Movement that feels subtle inside a mask can look exaggerated on camera, while a voice that feels loud may sound muffled. Record the character approaching, pausing, and retreating. Adjust posture and timing before adding volume. If dialogue is central to the role, consider whether a moving-mouth mask is worth buying.
Common Mistakes That Make a Great Mask Look Cheap
Wearing untouched everyday clothes
Ordinary clothes can work if the character is meant to look recently transformed. Otherwise, clean fabric and modern logos often clash with a detailed horror face. Remove visible branding and distress only where the story requires it.
Leaving exposed skin
Check wrists, neck, ankles, and the back of the head. Small gaps become obvious when the actor reaches or turns.
Mixing incompatible visual styles
An ancient corpse, futuristic armor, circus shoes, and a lumberjack axe may all be interesting separately. Together they create noise unless the backstory convincingly connects them.
Adding too much bright blood
Fresh-looking red can dominate every other detail. Start with restrained, dark tones and add only after testing under event lighting.
Ignoring the actor’s body language
Perfect clothing cannot save a character who strolls casually, checks a phone, or chats out of character where guests can see. Give the performer a simple physical rule: lead with the shoulders, protect one injured side, move in short bursts, or remain unnaturally still until guests cross a mark.
Choosing appearance over safety
Never block vision for a better photograph, overload an actor with heavy layers, or use unsafe footwear to perfect a silhouette. A convincing character must still be controllable in the environment.
A Practical Shopping and Build Order
Buying in the right sequence reduces wasted money.
- Choose the mask. Check fit, vision, breathing, coverage, material, and the character cues it provides.
- Write the one-sentence premise. Do this before choosing clothes.
- Plan the silhouette. Decide what the body must communicate from a distance.
- Solve the neckline and hands. These are the most common breaks in the illusion.
- Choose the base clothing. Match the identity, era, palette, and body shape.
- Fit and rehearse before distressing. Returns and adjustments are easier while items are still clean.
- Weather the pieces together. This helps the colors and wear patterns remain consistent.
- Add one prop only if it clarifies the story. Skip it if the character already reads well.
- Test in the real setting. Use the planned route, lighting, sound, and performance time.
Shoppers who are still choosing an anchor can browse The Horror Dome’s Halloween masks collection by character type, then apply this process before adding the rest of the costume.
Final Answer
To build a complete character around one great mask, treat the mask as the source of truth. Identify the person or creature, write a one-sentence story, build a matching silhouette, hide the neckline, continue the skin or fur into the hands, repeat the mask’s colors and textures, and choose movement that fits its expression. Add only the clothing damage and props the story actually needs.
The best final test is simple: cover the product labels, step back, and ask whether every visible choice appears to belong to the same character on the same night. If it does, the mask no longer looks like something being worn. It looks like a face.
Frequently Asked Questions
Should I buy the mask or the costume first?
Buy or select the mask first when it is meant to be the focal point. Its colors, proportions, coverage, material, and expression will determine which clothing and accessories work. If a coordinated full costume is available, compare its included pieces and sizing with a custom build before deciding.
How do I hide the bottom edge of a Halloween mask?
Use a collar, hood, cowl, scarf, high neckline, chest fur, or layered clothing that makes sense for the character. Fit the costume while turning and tilting the head; a seam hidden in a still pose may appear during movement.
Do Halloween mask gloves need to match exactly?
They do not need identical paint, but they should share the same skin or fur family, scale, level of decay, and overall finish. The hands must also allow the performer to move, grip, and operate the scene safely.
What clothes make a scary mask look more realistic?
Choose clothing based on the character’s identity and recent history rather than generic scariness. Match the era, occupation, silhouette, colors, and condition suggested by the face. Remove modern branding unless it belongs to the story.
How many props should a Halloween character carry?
Usually one clear, safe prop is enough. It should help explain who the character is or what just happened. If the mask, clothing, and performance already communicate the idea, the strongest choice may be no prop at all.
How can I distress a costume without overdoing it?
Start with diluted dirt and age tones, concentrate wear at realistic contact points, and add tears or stains only where the backstory supports them. Test the costume under the final lighting before adding more.
What safety checks should I perform with a full-head mask?
Check vision, breathing, hearing, heat, fit, trip hazards, range of motion, glove grip, and mask movement during a full rehearsal. Use planned breaks, hydration, a clear route, and a helper when the setting is crowded or visibility is limited.