
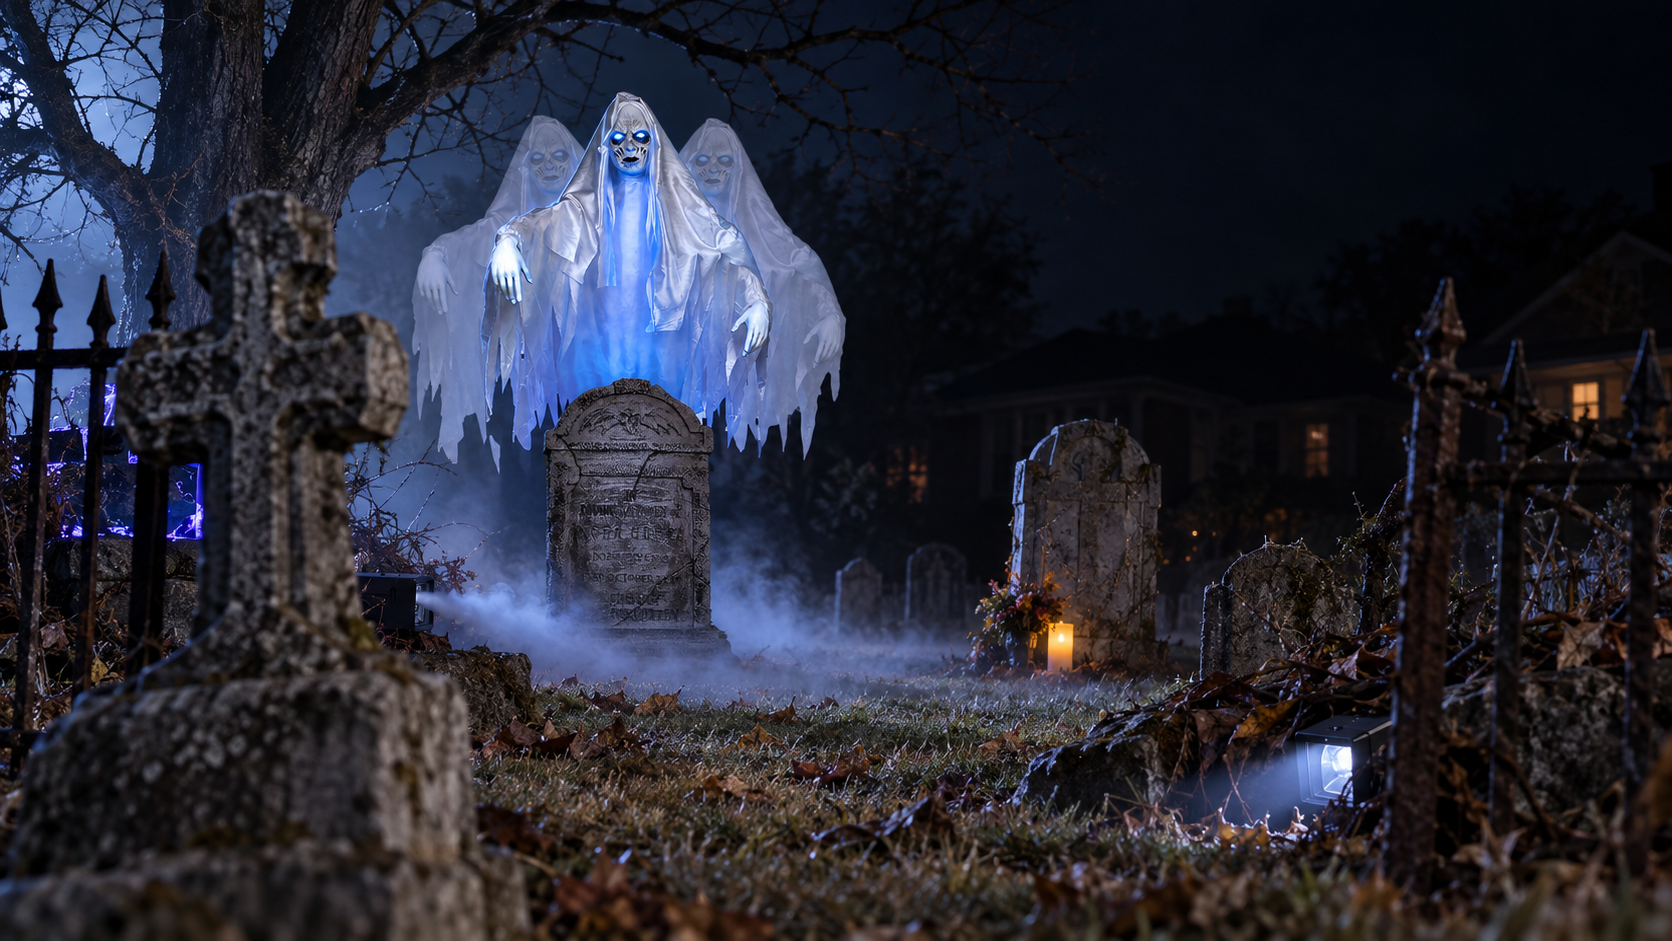
The lighting that makes a Halloween graveyard look real is low, directional, uneven, and restrained. Aim cool white or desaturated blue light across tombstones from near ground level, add a small amount of warm flicker around one focal point, keep parts of the yard genuinely dark, and use fog only where a narrow beam can reveal it.
That is the short answer. The biggest mistake is lighting the whole cemetery with one bright floodlight. It makes every prop equally visible, removes the shadows that create depth, and turns a graveyard into a display of objects sitting on a lawn.
A believable cemetery does something different. It lets the viewer discover the scene in layers: a pale stone in the foreground, a crooked cross behind it, a silhouette beneath a tree, and perhaps one moving figure that does not become obvious until the guest is already looking into the darkness.
You do not need dozens of fixtures to create that effect. In a typical front yard, three or four carefully placed lights will usually outperform a row of powerful floods.
The realistic graveyard lighting formula
Start with this simple combination:
- A cool, low side light to rake across the faces of the tombstones.
- A dim backlight to separate a tree, gate, reaper, or ghost from the background.
- One warm practical light such as a lantern or candle effect near the story’s focal point.
- Soft pathway light aimed at the walking surface, not into guests’ eyes.
- Optional fog or a brief strobe accent used in one controlled area.
This arrangement feels real because it resembles the way people expect an old cemetery to look in moonlight. The imagined moon creates a cool direction across the scene. A lantern or candle introduces a warmer human source. The darkness between them gives the yard scale.
The Horror Dome’s current Haunted Lighting collection is a useful place to compare atmospheric fixtures and practical lights. The products and prices mentioned in this guide were checked on October 3, 2026; availability and pricing can change.
Why one bright floodlight makes tombstones look fake
Bright front light is honest. It tells the eye exactly where each prop begins and ends. That is helpful for a parking lot, but terrible for an illusion.
Most Halloween tombstones are viewed from the sidewalk or driveway. When a powerful light sits close to the viewer and points directly at the display, it flattens carved lettering, exposes stakes and supports, and reveals that every stone occupies the same patch of ordinary grass. Shadows fall behind the props where nobody sees them.
Move that same light down and to one side. Now the beam skims across the stone. Raised letters catch light while recessed areas stay dark. Cracks appear deeper. The opposite edge falls into shadow. Even a lightweight prop begins to read as something with mass.
The principle is called raking light, but you do not need theatrical training to use it. Put the fixture low, point it across the surface instead of straight at it, and move it until the texture becomes visible.
Do not light every stone from the same angle. Real outdoor light is interrupted by trees, monuments, walls, and uneven ground. Allow one stone to be bright, another to be half visible, and a third to exist mainly as a silhouette.
The dark spaces are not unfinished areas. They are part of the design.
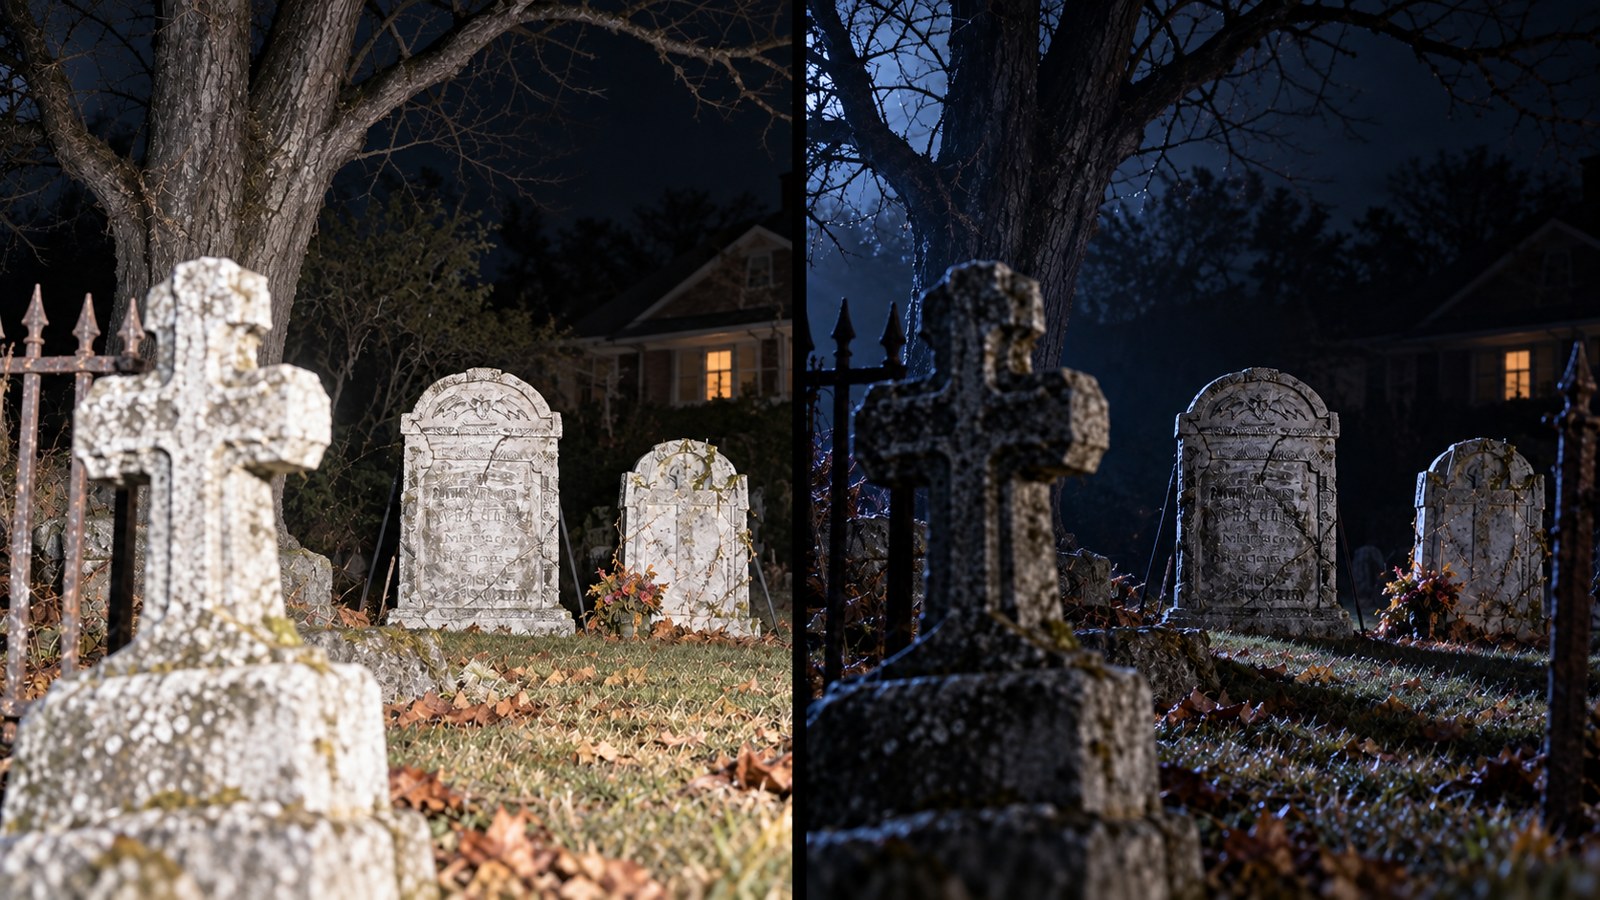
Use a cool color for moonlight—but avoid electric blue
A cool white or lightly desaturated blue is the safest starting point for a nighttime cemetery. It suggests moonlight without announcing itself as a colored Halloween bulb.
Deep, saturated blue often looks artificial because it erases natural-looking stone colors and turns the grass into a glowing stage. The same problem happens with solid green or purple washes. Those colors can be fun, but they usually create a stylized haunted attraction rather than a believable graveyard.
For a realistic result:
- Begin with neutral white light and reduce the brightness.
- If the fixture changes color, choose a pale steel blue rather than royal blue.
- Let the light touch gray stone, dead leaves, branches, and part of the ground.
- Avoid lighting the house façade unless it belongs to the scene.
- Check the effect with your eyes, not only through a phone camera.
Phone cameras brighten shadows and intensify color. A scene that photographs well in night mode can look too dim—or much too blue—to someone standing at the curb. Walk the actual guest route and adjust for the human view.
Aim the main light across the stones, not down on them
Imagine a row of five tombstones. Instead of placing five lights in front of them, place one or two fixtures at the outer edges of the cemetery and aim diagonally across the row.
The light should strike some faces, skim others, and miss at least one. That variation creates the impression that the cemetery continues beyond the visible area.
Low side lighting also makes ordinary yard texture work for you. Grass casts tiny shadows. Fallen leaves become uneven ground. A mound of mulch or loose soil looks more substantial. The same details disappear under overhead light.
If a stone has a carved name or epitaph you want guests to read, rotate the prop or the light a few degrees until the lettering catches the beam. Do not increase brightness first. Angle usually solves the problem more elegantly.
How low should the fixture be?
For a home graveyard, start with the lamp roughly six to eighteen inches above the ground. There is no single correct height. A fixture close to the ground creates long, dramatic shadows; a slightly higher fixture reveals more of the stone without producing the familiar “flashlight under the chin” look.
Hide the housing behind a low stone, clump of ornamental grass, broken fence section, or landscape feature. Keep ventilation openings clear and follow the fixture’s placement instructions. The goal is to conceal the source without trapping heat or creating a fire hazard.
Backlight one shape to give the cemetery depth
Once the stones have texture, add one dim light behind a tall shape. A bare tree, cemetery gate, angel, hooded reaper, or actor can become a silhouette against fog or the side of the house.
Backlighting is especially useful when a dark figure disappears into a dark yard. The light does not need to illuminate the face. A thin rim along the shoulders and head can be enough for the brain to recognize that someone—or something—is standing there.
If you include a live actor, give the performer a fixed position away from cords, stakes, moving props, and the public path. The Horror Dome’s Halloween masks collection can supply a strong character face, but lighting should support the mask rather than blast it from the front. A small side light catches the sculpted features; a backlight preserves the silhouette and lets the actor disappear again by taking one step into darkness.
Never ask a masked actor to move through a poorly lit guest route. Masks can limit peripheral vision. The audience may perceive darkness while the performer’s working area remains safely marked and rehearsed.
Add one warm light so the scene feels inhabited
Cool moonlight establishes the cemetery. A small warm source tells a story.
It might be a candle beside a memorial, a lantern hanging from a gravedigger’s hook, or a flicker behind a crypt window. Warm light attracts the eye, so reserve it for the place you want people to study first.
A battery-operated practical light with adjustable flicker and dimming can work well on a cemetery gatepost, mausoleum wall, or sheltered memorial—not lying loose in the grass. Choose a flameless design that can be positioned securely and operated without entering the guest route.
One warm source is usually enough. If every tombstone has an identical candle, the pattern begins to look decorative. Break the rhythm. Put light near the oldest-looking monument or the place where the story happened.
Use flameless candles around guests, fabric, dry leaves, foam props, and artificial cobwebs. Open flame has no place in a crowded Halloween display.
Use blacklight as a hidden detail, not the base color
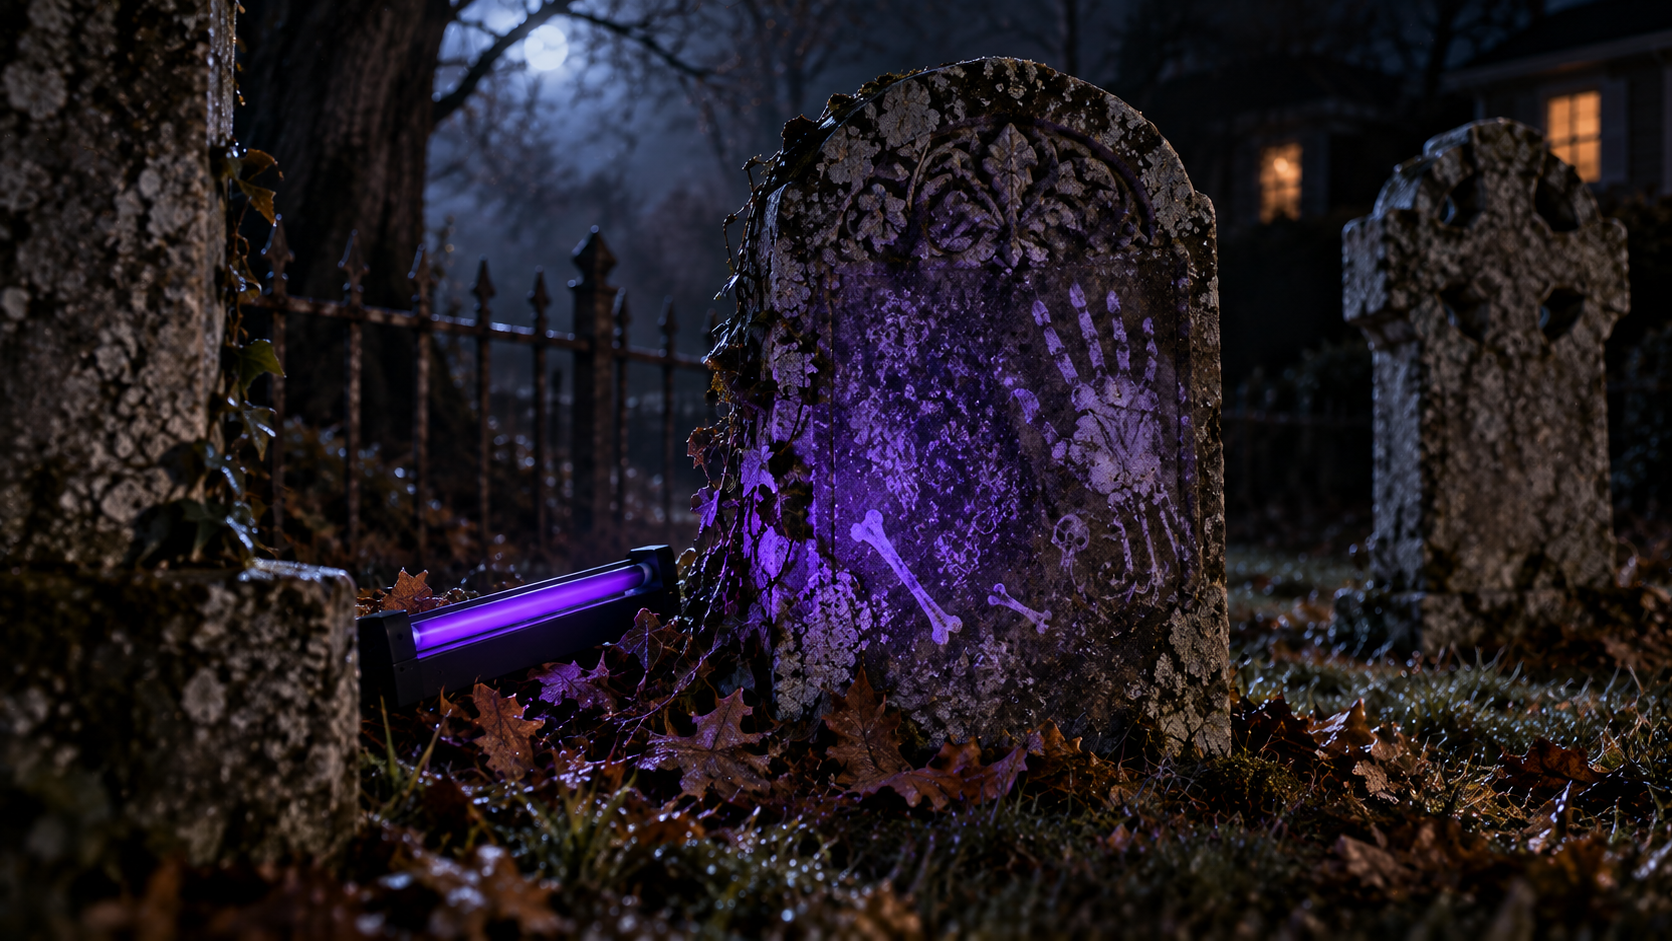
Blacklight can be effective in a graveyard when it activates a specific material: pale bones, UV-reactive moss, ghost writing, a hidden handprint, or the edge of a spectral figure.
The Horror Dome’s 18-inch Blacklight Fixture with Bulb was listed at $29.99 and available when checked. The product is intended to make whites and bright fluorescent colors radiate and includes a mountable fixture and bulb.
For a realistic cemetery, use that effect sparingly. Bright fluorescent paint across every stone will look like a blacklight room. A thin wash over one ghost, a few letters, or a bone pile feels stranger because the rest of the yard stays within the cool moonlight palette.
Test the actual paint, fabric, and prop under the fixture before installation. White materials vary widely under ultraviolet light. Some glow brilliantly, while others barely react.
Also remember that blacklight does not replace safety light. A guest still needs to see the walking surface, steps, railings, and changes in elevation.
Fog makes light visible—but it can also erase the cemetery
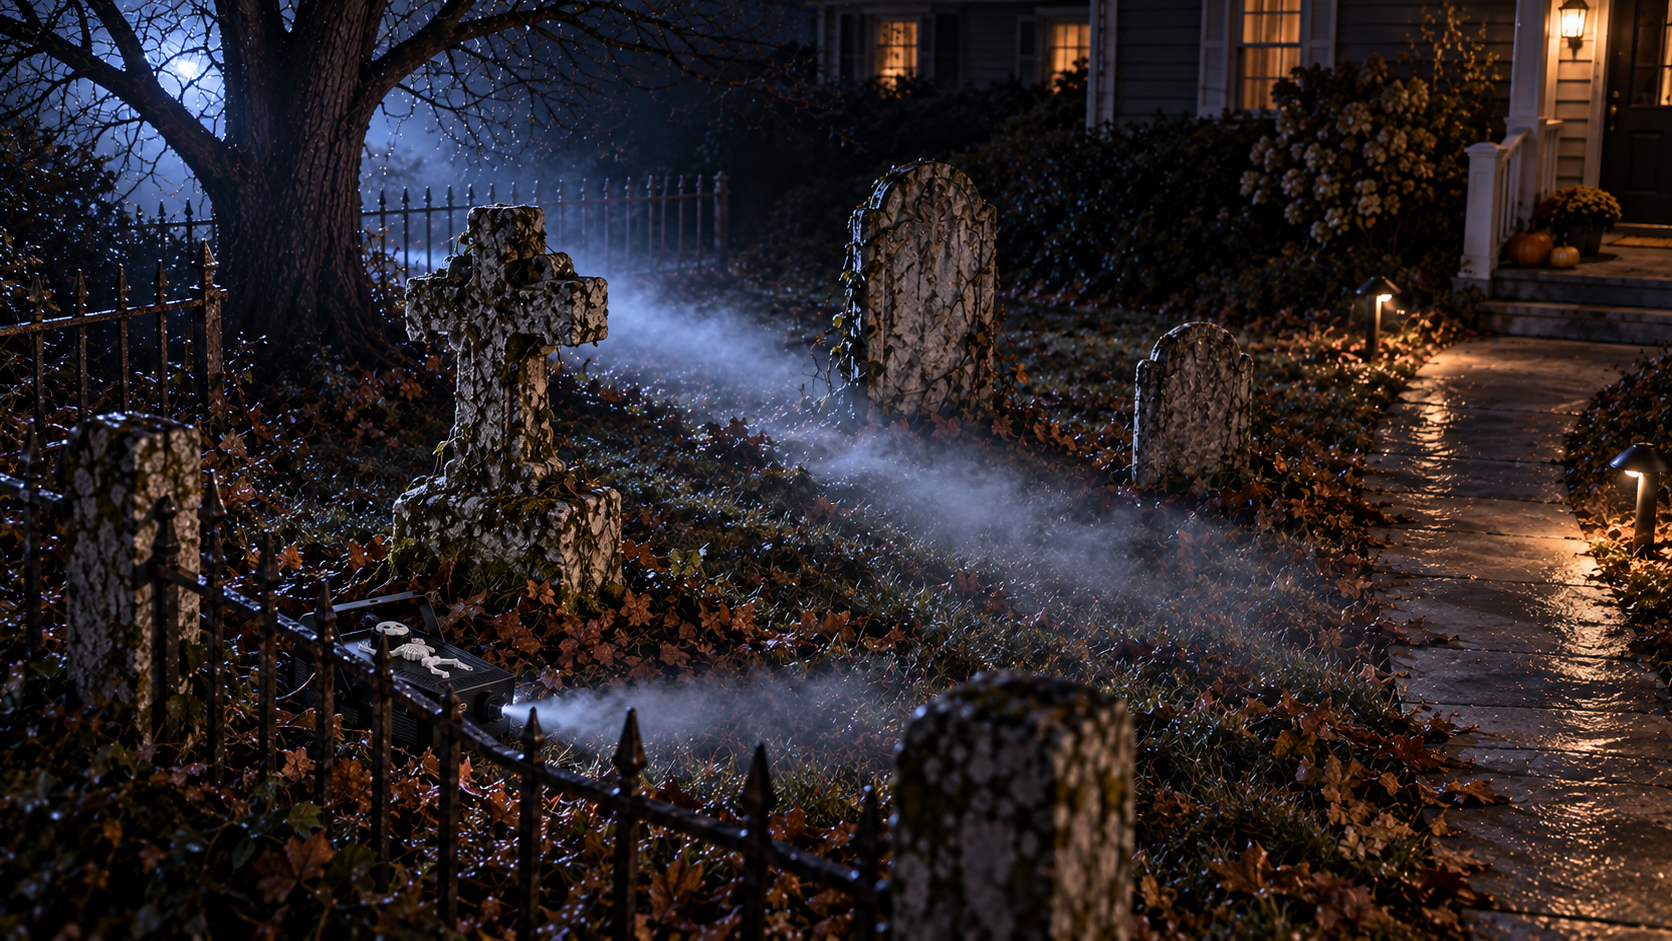
Fog is most convincing when it moves through a beam in thin layers. That lets the viewer see shafts of light between the stones and gives the yard a sense of depth.
Too much fog does the opposite. It becomes a bright wall, hides your best props, drifts into the street, and may annoy neighbors or affect drivers. Wind can empty a machine’s output from the scene in seconds, while a still, damp evening can hold fog far longer than expected.
The 400W Fog Machine, listed at $79.99 when checked, is described as a home-display unit that produces fog in four-minute intervals and includes a wired remote. That kind of output can support a compact cemetery if it is positioned with the breeze and tested before guests arrive. For help choosing capacity, match the fog machine to your yard or garage.
Place the machine outside the walking route and follow its operating, clearance, fluid, weather, and electrical instructions. Use only compatible fog fluid. Do not aim output directly at faces, pets, public roads, smoke detectors, or neighboring properties.
People with asthma, respiratory sensitivities, or sensory concerns may not want to walk through theatrical fog. Make the route understandable and give guests a way to pass without entering a dense effect.
The best light angle for fog
A beam aimed slightly across the viewer’s line of sight will reveal fog better than a lamp pointed directly toward the viewer. Keep the fixture hidden and shield guests from glare.
Try a narrow cool backlight behind the stones. When fog crosses it, the beam appears and disappears naturally. If the entire yard is filled with front light, the fog reflects that brightness and flattens the scene.
Strobe is an accent, not continuous graveyard light
A brief strobe can suggest lightning or expose a figure in a sudden flash. Continuous rapid strobing usually makes a cemetery feel like an amusement effect, and it can create a serious accessibility problem for guests with photosensitive epilepsy or other sensitivities.
The Horror Dome’s Mini Flash Strobe, listed at $24.99 when checked, has variable speed and a mounting bracket. The product page describes both slow and rapid settings. For a graveyard, the more naturalistic use is a slow, occasional burst from behind a tree or crypt façade—not a nonstop flash aimed at the public.
Warn guests clearly before any strobe area, keep the fixture out of direct sight, and provide a non-strobe route. If the display serves a neighborhood with many young children, skipping the strobe is often the better choice. A steady backlight and sound cue can create tension without flashing.
Light the focal prop differently from the background
A focal prop needs contrast, not necessarily more brightness.
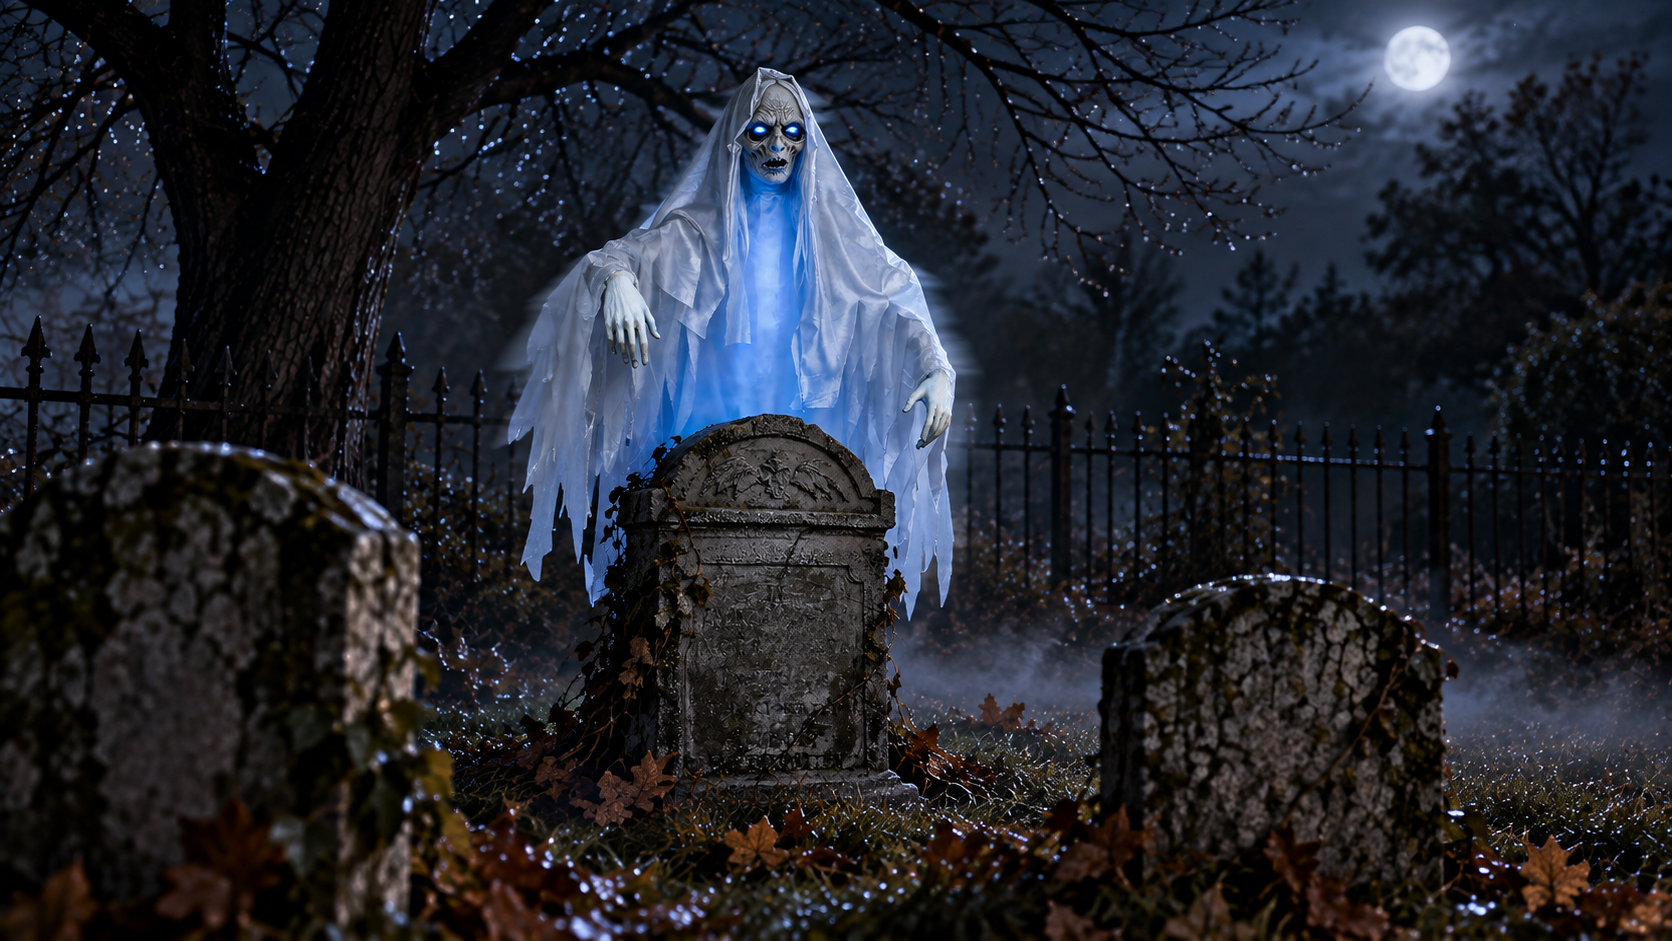
The Ghost Woman Over Tombstone graveyard prop, listed at $299.99 when checked, is a 72-inch animated figure with a ghostly LED, glowing eyes, sound, and swaying motion. Because the prop already contains light, flooding it from the front would reduce the internal effect.
Instead, give the surrounding tombstones low cool side light and allow the ghost’s own glow to identify her face. Add a restrained backlight only if the figure merges into the background. The visual hierarchy becomes clear:
- Foreground stones establish the location.
- The internal glow attracts attention.
- The swaying movement rewards the viewer who keeps watching.
- Darkness around the figure conceals the support and preserves the illusion.
This is a useful rule for any illuminated or animated centerpiece: light the world around it first, then add only what the prop still needs.
A three-zone plan for a typical front yard
Dividing the display into zones prevents every effect from competing.
Zone 1: The invitation
The front edge should be readable from the sidewalk. Use one low side light across two or three stones and a safe, subdued light on the walking surface. This is where guests understand the theme.
Keep the brightest object slightly inside the property, not at the curb. You want the eye to travel inward.
Zone 2: The discovery
The middle ground holds the focal monument, ghost, or practical candle. It should have the strongest contrast in the display.
If you use blacklight, restrict it to a detail here. If you use an actor, this zone can contain the character’s first still pose while a barrier preserves distance.
Zone 3: The unanswered question
The back of the yard does not need full illumination. A tree silhouette, a faint figure, or an occasional fog-revealed beam is enough.
Viewers mentally complete what they cannot see. That implied space makes a small front yard feel deeper and more dangerous.
A Lafayette example: lighting for damp October nights
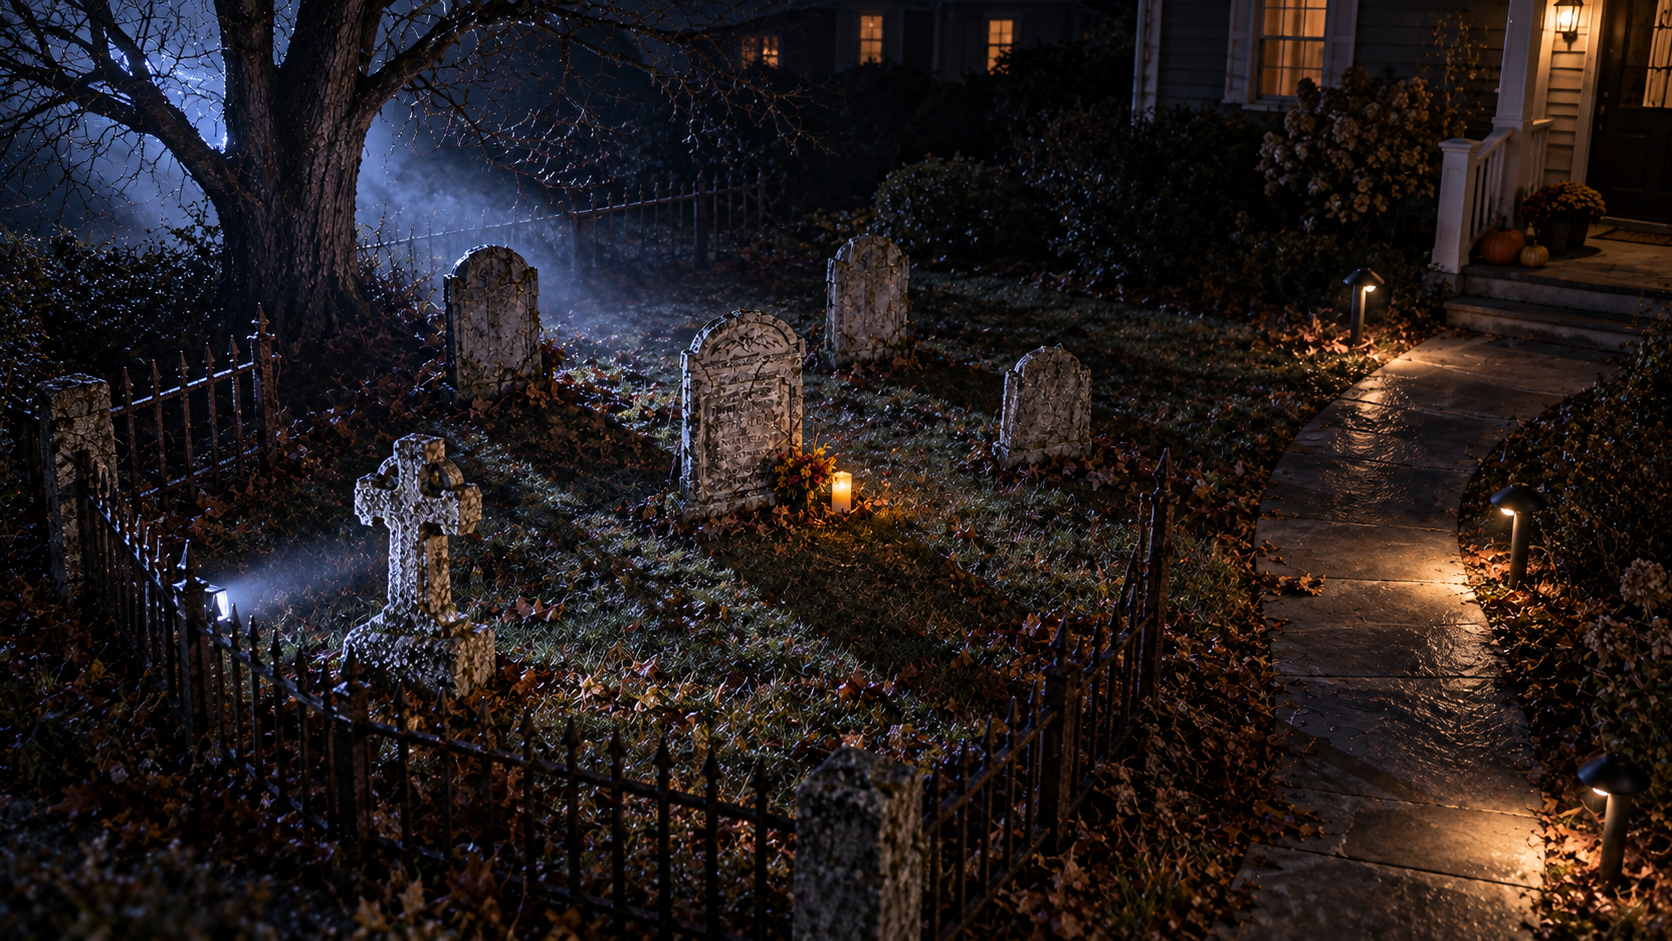
Picture a home graveyard on a residential street in Lafayette, Indiana. The yard is not huge—about 30 feet from sidewalk to porch—and a mature maple covers one side. October leaves are already collecting along the curb. The display owner wants atmosphere without shining bright light into a neighbor’s window.
The first fixture goes low near the driveway and aims diagonally across three tombstones. Its cool white beam stops at a short fence. A second, dimmer fixture sits behind the maple and creates a narrow rim around a hanging figure. A warm flameless candle glows on a sheltered memorial near the porch. The walkway has separate low-output safety lights that point down.
On calm nights, a small amount of fog enters from the porch side and crosses the cool beam. On windy or rainy nights, the fog machine stays off and the scene still works. Nothing depends on one effect.
That last point matters in Tippecanoe County, where an October evening can shift from still and damp to breezy. Design the lighting so the graveyard survives the weather plan. Fog should be a bonus, not the foundation.
Before opening the display, the owner stands at three positions: across the street, at the sidewalk, and at the porch. From across the street, the stones create a broken rhythm. From the sidewalk, lettering and texture appear. At the porch, the path is safe even though the cemetery remains dark.
The result is not bright. It is legible in the right places.
How to keep the graveyard safe without ruining the mood
Atmosphere never justifies a hidden hazard. The audience-facing scene can appear dark while the actual route remains carefully managed.
Separate scenic light from safety light
Scenic lights reveal tombstones, fog, and figures. Safety lights reveal steps, cords, uneven ground, handrails, and exits. Do not ask one fixture to do both jobs.
Aim pathway fixtures downward and shield them so guests do not see the bulb. Warm, low-output light often blends into the scene better than bright white path lights.
Protect cords and connections
Use equipment rated for the location and follow the manufacturer’s instructions. Outdoor electrical connections should be protected from moisture and kept off wet ground. Use appropriate ground-fault protection. Do not run cords where people can trip, wheelchairs can catch, or strollers must cross.
Tape alone is not a universal outdoor cord solution. Reroute, cover, or physically exclude the connection as appropriate for the site.
Keep fixtures stable and cool
Stake or mount lights securely according to their instructions. Do not bury housings in leaves, fabric, or mulch. Maintain required clearance from foam, dry vegetation, costumes, and scenery.
LED fixtures usually produce less heat than traditional lamps, but “less” does not mean “none.” Inspect the setup during a full-length test.
Prevent glare and road spill
Stand where drivers, neighbors, and pedestrians will see the display. If a bulb is visible, shield or re-aim it. Keep moving beams and flashes away from the street.
Turn off or reduce effects if fog drifts into traffic, if rain reaches equipment beyond its rating, or if wind destabilizes props.
Plan for shutdown
Know which switch or plug safely shuts down each zone. Label controllers and keep access clear. Do not place the only disconnect behind a moving prop or inside the guest area.
A convincing haunt feels controlled even when it looks abandoned.
Common graveyard-lighting mistakes
Lighting every prop equally
Equal brightness eliminates hierarchy. Decide which stone or figure is the star, which objects support it, and which forms can remain partly hidden.
Using only saturated purple and green
Those colors communicate “Halloween,” but they rarely communicate “real cemetery.” Use them as small accents if the theme is stylized. For realism, rely on cool neutral light, warm practicals, and shadow.
Pointing lights into guests’ eyes
Glare destroys night vision and makes the next dark step less safe. Aim across the route, down at the ground, or from behind scenery. Shield the source.
Exposing the equipment
A visible modern housing, orange extension cord, or power strip can break the illusion. Hide equipment through placement and scenery while preserving airflow, access, and safety.
Adding fog before fixing the light
Fog does not rescue flat lighting. Build a strong scene without fog first. Then use a small amount to reveal one beam or create separation.
Making the whole show flash
Continuous strobe tires the eye, overwhelms slower effects, and excludes some guests. Use a rare accent with warnings and a bypass—or omit it.
Forgetting the view from the street
A light that looks perfect beside the tombstone may disappear from the sidewalk or shine into a neighbor’s home. Always test from the actual viewing positions.
A practical setup order
Install the display in this sequence:
- Place and secure tombstones, fencing, figures, and scenery.
- Establish the guest route and all barriers.
- Install downward-facing safety light.
- Add the main low side light across the stones.
- Add one backlight to create depth.
- Add one warm practical or internally lit focal prop.
- Test optional blacklight, fog, or strobe separately.
- Hide fixtures and cords without blocking ventilation or access.
- Run the complete display for at least 30 minutes.
- Walk the route at child height and adult height, then check the street and neighboring sightlines.
Do not begin by installing every effect you own. Build one readable picture, then stop when the next addition no longer improves it.
A simple four-light graveyard recipe
If you want a concrete starting point, try this arrangement:
| Position | Purpose | Color and intensity | Aim |
|---|---|---|---|
| Front-left, near ground | Tombstone texture | Dim cool white or pale steel blue | Diagonally across the front row |
| Rear-right, concealed | Silhouette and depth | Very dim cool white | Toward the back of a tree, gate, or figure |
| At the focal memorial | Story and eye direction | Warm amber flicker | Onto one nearby face or object |
| Along the guest route | Footing and accessibility | Low warm or neutral white | Straight down, fully shielded |
Add fog only after this picture works. Add blacklight only if a specific material needs it. Add strobe only if the scene calls for lightning and you can manage warnings and an alternate route.
This recipe is deliberately modest. Darkness provides the fifth light.
So, what lighting makes a graveyard look real?
Use dim, cool light from low side angles, not one bright flood from the front. Let shadows divide the cemetery into layers. Backlight one tall shape. Add a single warm flicker where the story needs a human presence. Keep fog thin, ultraviolet details selective, and strobe rare or absent.
Most importantly, light what guests need to understand and leave the rest uncertain.
When the eye can see every stake, seam, cord, and prop edge, it sees a Halloween display. When it catches a name on a stone, loses the path of a shadow, and notices a pale figure moving behind the fog, it begins to believe in the graveyard.
Frequently Asked Questions
What color light is best for a Halloween graveyard?
Cool white or a pale, desaturated steel blue usually looks most like moonlight. Use deep blue, green, or purple only as limited accents if you want a more stylized effect. A small warm amber flicker can mark a lantern, candle, or memorial.
Should Halloween tombstones be lit from the front or below?
Light them from low side angles rather than straight from the front. A diagonal beam reveals carved lettering and texture while casting long shadows. Avoid aiming a very bright light directly upward at every stone; vary the angle and brightness.
How many lights do I need for a front-yard graveyard?
Many small yards need only three or four carefully placed lights: one or two low side lights for the stones, one backlight for depth, and separate shielded pathway lighting. Add effects only if they improve a clear focal point.
Does fog make a Halloween cemetery look more realistic?
Thin, moving fog can reveal light beams and create depth. Heavy fog can hide props, reflect too much light, drift into streets, and bother guests with respiratory sensitivities. Treat fog as an optional accent and provide a clear bypass.
Can I use strobe lights in a family Halloween display?
You can, but use them sparingly, keep them out of direct view, warn guests, and provide a non-strobe route. Continuous flashing can affect photosensitive visitors and usually looks less realistic than an occasional lightning-style burst.
How do I light a graveyard safely without making it too bright?
Separate scenic lighting from safety lighting. Aim scenic beams across props and keep pathway fixtures low, downward-facing, and shielded. Protect outdoor power connections, remove trip hazards, prevent glare, and maintain a clear shutdown plan.